82JS-013
Sending a Fax to a Destination that Was Specified Before
How to specify the destination from the send log and send a fax to it is described here.
1
Place the original in the feeder or on the platen glass.
2
Select <Fax> in the Home screen.
If a login screen appears,

Authorized Send is set on the machine. Log in with the following steps.
1
Enter your user name.
2
Enter the password.
3
Select the authentication server.
4
Select <Log In>.
3
Select <Reset>.
If the destinations set by the previous user are still selected, it can cause a transmission error. Always reset the settings before sending.
4
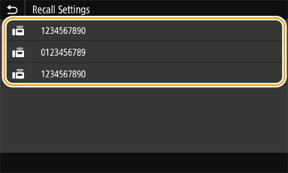
Select <Recall Settings> in the <Specify Destination> tab.
If the send log is not displayed,

If <Restrict Resending from Log> is set to <On>, you cannot use this function. Change the setting to <Off>.
<Menu>  <Function Settings> <Function Settings>  <Send> <Send>  <Common Settings> <Common Settings>  <Restrict Resending from Log> <Restrict Resending from Log>  <Off> <Off>   |
If <Restrict New Destinations> is set to <On>, the previously used destinations are deleted and you cannot use this function. Change the setting to <Off>.
<Menu>  <Function Settings> <Function Settings>  <Send> <Send>  <Common Settings> <Common Settings>  <Restrict New Destinations> <Restrict New Destinations>  <Off> <Off>   |
When you turn off the machine, the previously used destinations are deleted and you cannot use this function.
If you directly enter a destination when sending a fax, the destination is not recorded and does not appear in the send log.
5
Select the destination.
If the previous send entry in the log was to multiple destinations, only the first destination is displayed in the log, but selecting the entry specifies all the destinations.

The selected destination and the scan settings used the previous time are specified.
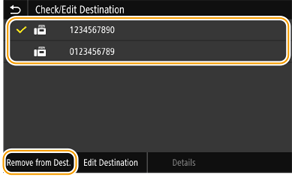
To delete destinations,

1
Select <Confirm Destination>.
2
Select the destinations to delete, and select <Remove from Dest.>.

3
Select <Yes>.
6
Specify the scan settings if necessary.
7
Select <Start>.
When the <Confirm Destination> screen is displayed, check that the destinations are correct and select <Start Scanning>.
The scan starts.
If the original is placed in the feeder
When the scan is complete, the faxes are sent.
If the original is placed on the platen glass,

When the scan is complete, perform the following.
1
Select the original size.
If there is only one page to scan, proceed to step 3.
2
Place the next original on the platen glass, and select <Scan Next>.
Repeat until you finish scanning all of the pages.
3
Select <Start Sending>.
The faxes are sent.