9870-03R
[macOS] Installing the printer driver (network environment)
Steps for installing the printer driver with the installer and registering the machine are described here.
Perform step 1 to step 3.
This section uses macOS 11 (Big Sur) as an example.
Prerequisites for installation and registration

Exit all applications.
When connecting with TCP/IP, check and make a note of the IP address of your machine.
Step 1 Downloading the printer driver
1
In your browser, open https://global.canon/en/support/.
2
Select your country or region.
3
Click "Support".
4
Open the download page for the driver and download the driver.
Step 2 Installing the printer driver
1
Open the driver installer folder and select one of the following:
[UFRII_LT_LIPS_LX_Installer.pkg]
[Canon_PS_Installer.pkg]
[Canon_Driver.pkg]
2
Confirm the content of the Software License Agreement, and then click [Continue].
If a dialog box appears for accepting the Software License Agreement, click [Agree].
3
Click [Install].
If a dialog box appears for entering a user name and password, enter your computer administrator name and password and follow the instructions in the dialog box.
4
Click [Close].
Step 3 Registering the machine
1
In macOS, display the [System Preferences] dialog box, and then click [Printers & Scanners].
2
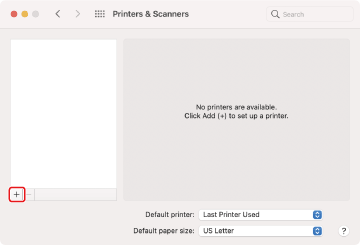
Click [+] at the bottom of the displayed dialog box.
If a pull-down button is displayed after clicking [+], select [Add Printer or Scanner].
3
Register the machine.
For a TCP/IP connection

1
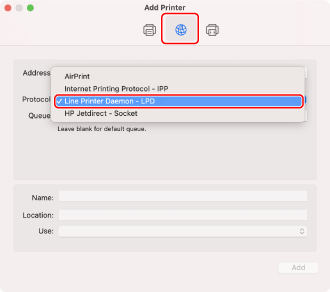
Click [ IP] in the toolbar, and then select [Line Printer Daemon – LPD] in [Protocol].
 IP] in the toolbar, and then select [Line Printer Daemon – LPD] in [Protocol].
2
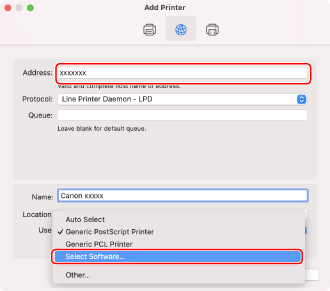
Enter the IP address of the machine in [Address], and then select [Select Software] in [Use].
If a driver supporting the machine is displayed under [Use], skip to step 6.
NOTE
Even if you enter a valid IP address, a message indicating that the entered IP address is not valid may be displayed.
For a Bonjour connection

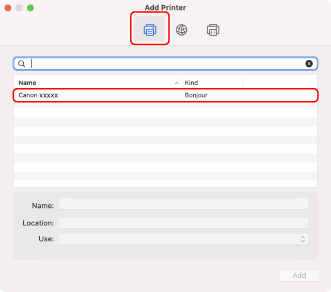
1
Click [ Default] in the toolbar, and then select the machine in the list.
 Default] in the toolbar, and then select the machine in the list.
Select the machine indicated as [Bonjour] under [Kind].
2
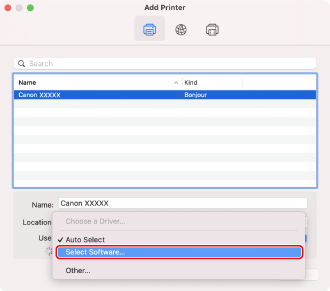
Select [Select Software] in [Use].
If a driver supporting the printer is displayed under [Use], skip to step 7.
4
Check the driver which supports the machine.
If you do not know the name of the supporting driver, see the Readme file accompanying the driver installer.
5
Select the machine in the list in the [Printer Software] dialog box, and then click [OK].
6
Change the [Name] of the machine if necessary, and then click [Add].
7
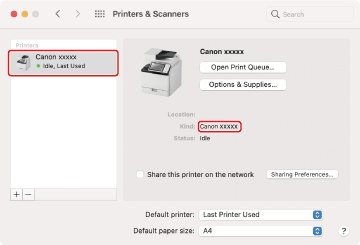
Confirm that the machine and its type are displayed in the dialog box.
If optional products are attached, you can check from [Options & Supplies]  [Utility]
  [Open Printer Utility]
  [Printer Information]
  [OK].
[OK].
 [Utility]
  [Open Printer Utility]
  [Printer Information]
  [OK].
[OK]. 