9870-00A
[Windows] Installing the printer driver (network environment)
Steps for installing the printer driver using the installer are described here.
When you start the computer, log on as an Administrators member.
Step 1 Downloading the printer driver
1
In your browser, open https://global.canon/en/support/.
2
Select your country or region.
3
Click "Support".
4
Open the download page for the driver and download the driver.
Step 2 Installing the printer driver
1
Double-click the downloaded file to decompress it.
The installer starts.
If the installer does not start automatically after the file is decompressed, double-click [Setup.exe].
2
Select a language, and then click [Next].
3
Confirm the content of the CANON SOFTWARE LICENSE AGREEMENT, and then click [Yes].
4
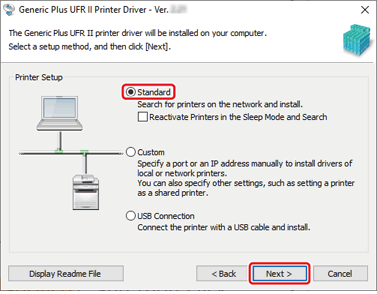
Select [Standard], and then click [Next].
[Reactivate Printers in the Sleep Mode and Search]: Select this when the machine might be in sleep mode.
5
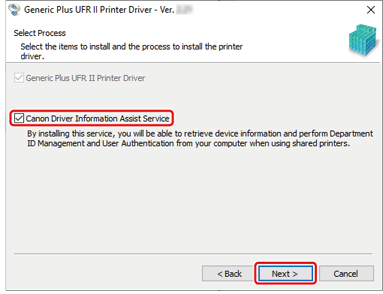
Select [Canon Driver Information Assist Service], and then click [Next].
6
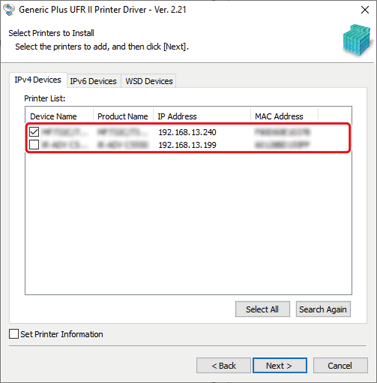
Select the machine in [Printer List].
[IPv4 Devices]/[IPv6 Devices]/[WSD Devices] tab: You can switch displays by clicking the tabs.
If the machine is not displayed in [Printer List], click [Search Again].
7
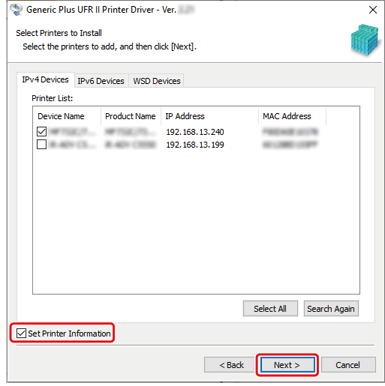
Select [Set Printer Information], and then click [Next].
8
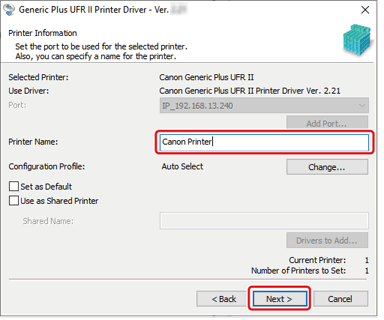
Change the [Printer Name] if necessary, and then click [Next].
[Set as Default]: Select this to set the device as the device that is normally used.
[Use as Shared Printer]: Select this to use the computer with the installed driver as a print server.
9
Check that the machine appears in [Printer List for Driver Installation], and then click [Start].
Install the driver according to the instructions on the screen.
10
Click [Restart] or [Exit].
When the driver is installed correctly, the machine appears in [Devices and Printers] on the Control Panel.