9870-004
[Windows] Cannot correctly install a Canon driver in a Windows 11/Windows 10 environment
When using Windows 11 or Windows 10, you may not be able to correctly install the Generic Plus driver via a USB connection, depending on the model. In this case, follow the procedure below to reinstall or update the driver.
NOTE
Screens and operations may differ, depending on the environment of your computer and the following conditions.
The device you are using and its settings, firmware version, and option configuration
The driver you are using and its version
Prerequisites
When starting the computer, log on as a member of Administrators.
Download the latest version of the Generic Plus driver from the Canon website.
Canon website: https://global.canon/
Canon website: https://global.canon/
1
Disconnect the USB cable.
2
Click [ Start] - [
 Settings] in Windows.
Start] - [ Settings] in Windows.3
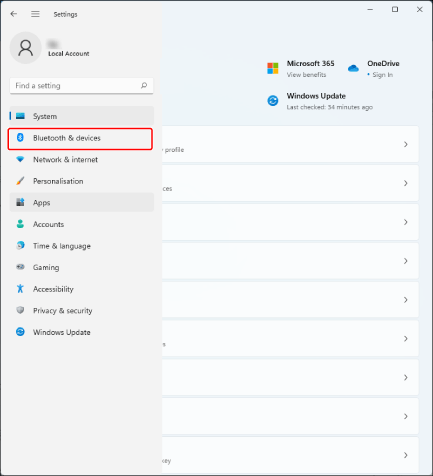
Click [ ] - [Bluetooth & devices] on the top left of the screen.
] - [Bluetooth & devices] on the top left of the screen.For Windows 10, display [Devices] - [Printers & scanners] → select the device to configure → click [Manage]. Click [Printer properties] on the [Manage your device] screen, and proceed to step 7.
4
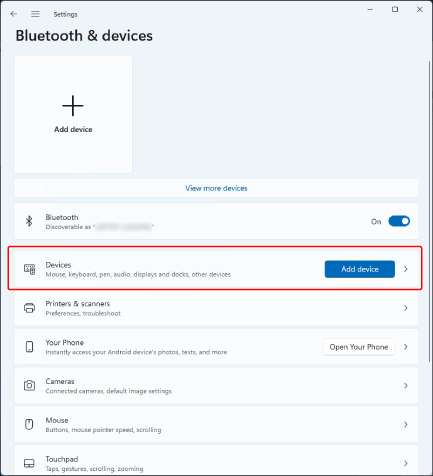
Click [Devices].
5
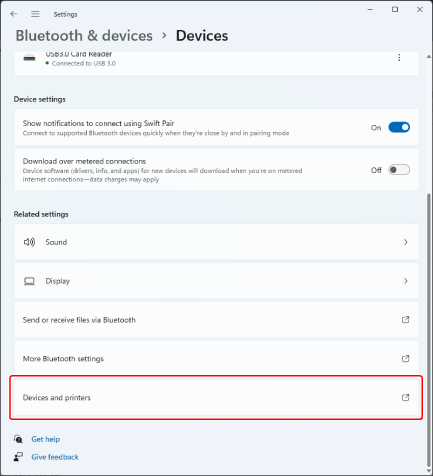
Click [Devices and printers].
6
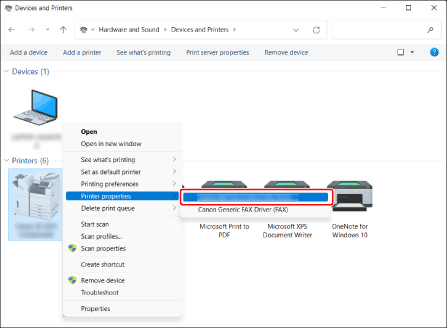
Right-click the model of your machine → select the printer driver to use in [Printer properties].
If multiple drivers are not displayed, select [Printer properties].
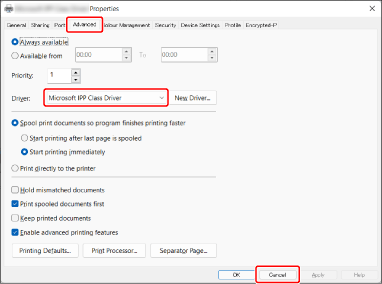
Select [Advanced] on the displayed screen and confirm that [Microsoft IPP Class Driver] is displayed in the driver pull-down menu → click [Cancel] to close the screen.
8
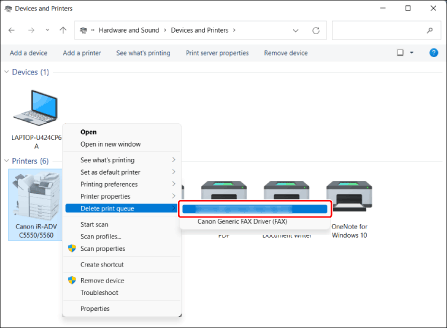
Right-click the model of your machine on the [Devices and Printers] screen → select the printer driver displayed in step 7 in [Delete print queue].
If [Delete print queue] is not displayed, select [Remove device].
9
Restart the computer.
10
Install the latest version of the Generic Plus driver via a USB connection.
For details on the installation method, see the installation guide on the Canon portal website (https://oip.manual.canon/).
If the above procedure does not solve the problem, try the procedure below.
1
Disconnect the USB cable.
2
Click [ Start] - [ Settings] in Windows.
Start] - [ Settings] in Windows.3
Click [] - [Bluetooth & devices] on the top left of the screen.
] - [Bluetooth & devices] on the top left of the screen.For Windows 10, display [Devices] - [Printers & scanners] → select the device to configure → click [Manage]. Click [Printer properties] on the [Manage your device] screen, and proceed to step 7.
4
Click [Devices].
5
Click [Devices and printers].
6
Right-click the model of your machine → select the printer driver to use in [Printer properties].
If multiple drivers are not displayed, select [Printer properties].
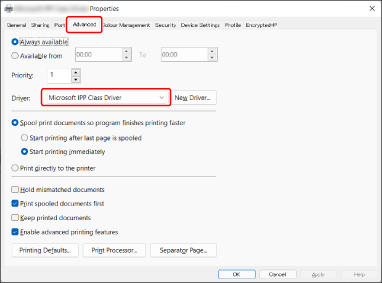
Select [Advanced] on the displayed screen and confirm that [Microsoft IPP Class Driver] is displayed in the driver pull-down menu.
8
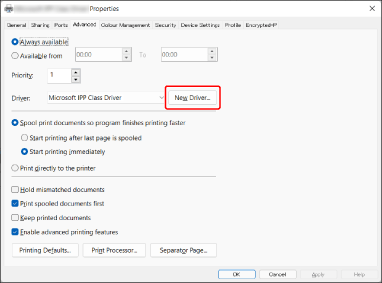
Click [New Driver].
9
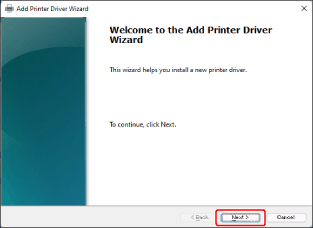
On the displayed screen, click [Next].
10
Click [Have Disk].
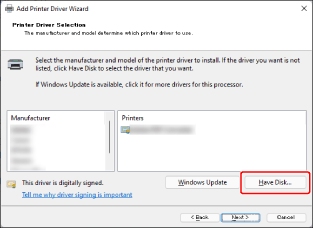
11
Click [Browse], specify the inf file in the following folder of the driver you obtained, and click [OK] to update the driver.
\x64\Driver\CNLB0MA64.INF

NOTE
This FAQ explains the example of Windows 11.