Cleaning the Pressure Roller for Fixing
If streaks appear on the printed page, the pressure roller for fixing may be dirty. This mode cleans the pressure roller for fixing by passing the printed cleaning sheet through the machine.
|
IMPORTANT
|
|
The following paper can be used for the cleaning sheet.
Size: A4
Type: Thin, plain, colour, recycled
|
|
NOTE
|
|
If paper that cannot be used for the cleaning sheet is registered in [Register Multi-Purpose Tray Defaults] in [Preferences] (Settings/Registration), set [Register Multi-Purpose Tray Defaults] to 'Off'. (See "Registering Multi-Purpose Tray Default Settings.")
|
1.
Press  (Settings/Registration).
(Settings/Registration).2.
Press [Adjustment/Maintenance] → [Maintenance] → [Clean Pressure Roller for Fixing].
3.
Select the paper source → press [OK].
|
IMPORTANT
|
|
The cleaning sheet cannot be printed when an error has occurred in the machine. Clear errors before printing the cleaning sheet.
|
|
NOTE
|
|
First set the size and type of paper to use for the cleaning sheet.
|
4.
Press [Start Printing].
The paper selected to use for cleaning is printed.
5.
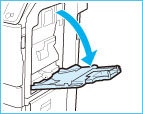
Open the multi-purpose tray.
6.
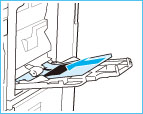
Load the cleaning sheet into the multi-purpose tray with the printed side facing up, and the arrow pointing toward the machine.
Adjust the multi-purpose tray's settings for the cleaning sheet.
7.
Press [Start Cleaning].
|
NOTE
|
|
The cleaning of the pressure roller for fixing takes approximately 30 seconds.
The cleaning process cannot be cancelled once it begins. Please wait until it is completed.
If the cleaning sheet jams while cleaning, the error indicator flashes. Remove the jammed cleaning sheet and try again.
|