Registering Destinations in the Address Book
You can register up to 100 destinations for Coded Dial in the Address Book. You can edit or delete destinations that you have registered.
1.
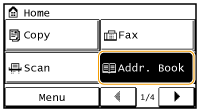
Press  and tap <Addr. Book>.
 and tap <Addr. Book>.
2.
Tap <Regist Dest.>.
If a screen appears prompting you to enter a PIN, enter the correct PIN using the numeric keys, and tap <Apply>. Setting a PIN for Address Book
3.
Select <Coded Dial>  <Fax>
<Fax>  <Name>.
 <Fax>
<Fax>  <Name>.
Registering <Name> is optional. If you register <Name>, the destination can be searched alphabetically.
4.
Enter the name using the numeric keys, and Tap <Apply>.
5.
Tap <Fax Number>.
6.
Enter the number using the numeric keys, and tap <Apply>.
 Making detailed settings
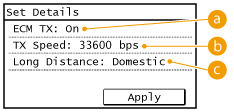
After tapping <Details>, a screen similar to the following is displayed.

 <ECM TX>
If an error occurs in an image that is being sent, the error is checked and corrected to prevent an improper image from being sent when setting <On>.
 <TX Speed>
If it takes time for transmissions to start, such as when there is a poor telephone connection, you can adjust the transmission start speed downward incrementally starting from "33600 bps".
 <Long Distance>
Specify <International (1)> to <International (3)> according to the transmission conditions when registering overseas fax numbers.
 |
|
You can also make detailed settings for destinations from <Menu>
 <Fax Settings>. However, settings made from <Addr. Book> are enabled for the detailed settings of destinations registered in the Address Book. <Fax Settings>. However, settings made from <Addr. Book> are enabled for the detailed settings of destinations registered in the Address Book. |
7.
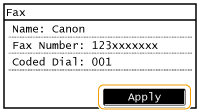
Tap <Apply>.
A three-digit number is automatically set to destinations. The number can be edited after it has been registered.

Editing the Content of Registered Destinations
After registering destinations, you can change the content of destinations such as numbers, names, types, and coded dial numbers.
1.
Press  and tap <Addr. Book>.
 and tap <Addr. Book>.
2.
Tap <Details/Edit>.
3.
Use  /
/ to select the tab containing the destination you want to edit, and tap the destination.
 /
/ to select the tab containing the destination you want to edit, and tap the destination.
4.
Tap <Edit>.
If a screen appears prompting you to enter a PIN, enter the correct PIN using the numeric keys, and tap <Apply>. Setting a PIN for Address Book
5.
Select the item you want to edit, perform editing, and then tap <Apply>.
6.
Tap <Apply>.

Deleting a Registered Destination
1.
Press  and tap <Addr. Book>.
 and tap <Addr. Book>.
2.
Tap <Details/Edit>.
3.
Use  /
/ to select the tab containing the destination you want to delete, and tap the destination.
 /
/ to select the tab containing the destination you want to delete, and tap the destination.
4.
Tap <Delete>.
If a screen appears prompting you to enter a PIN, enter the correct PIN using the numeric keys, and tap <Apply>. Setting a PIN for Address Book
5.
Tap <Yes>.