Editing the Settings of Each Partition
This section describes how to edit a job ticket that applies to certain pages of a job (partition).
You cannot change the Output Method settings separately for each page range. Output Method settings are applied to the whole job.
|
IMPORTANT
|
|
This mode cannot be used with jobs without a job ticket.
|
1.
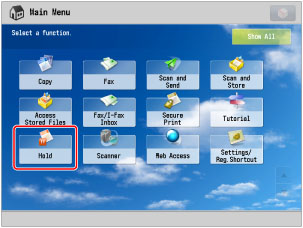
Press [Hold].
2.
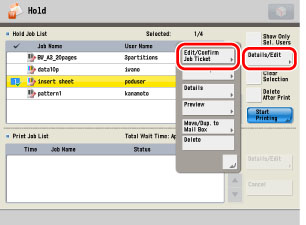
Select the desired job → press [Details/Edit] → [Edit/Confirm Job Ticket].
3.
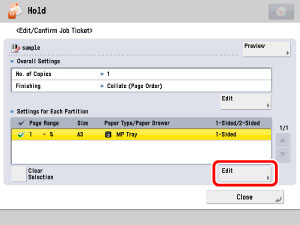
Select the desired page range → press [Edit] under <Settings for Each Partition>.
If there are three or more stored page ranges, you can scroll through the list by pressing [ ] or [
 ].
].
 ] or [
 ].
].You can select up to 100 page ranges.
|
NOTE
|
|
You can cancel a selection by selecting the page range again.
To cancel all page ranges, press [Clear Selection]. (When there are no selected page ranges, [Clear Selection] changes to [Select All].)
|
4.
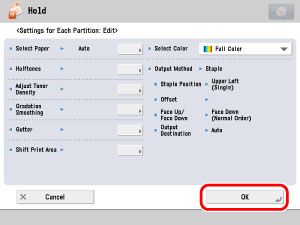
Specify each setting → press [OK].
|
NOTE
|
|
If multiple page ranges are selected and the settings of each page range are different, [Mixed] is displayed for [Output Paper Size], and [Each Partition] or [Apply Settings for Each Partition] is displayed for the other settings.
|
If you want to set the paper source:
Press [Select Paper].
If you specify the paper from the paper source, press [Specify by Drawer] → select the paper source → press [OK].
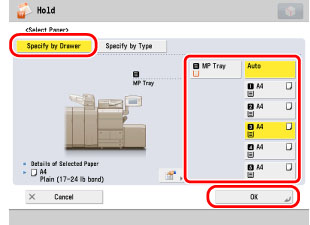
|
NOTE
|
|
If you press
 , the detailed information of the selected paper is displayed. , the detailed information of the selected paper is displayed. |
If you specify the paper from the paper type, press [Specify by Type] → select the paper from the list → press [OK].
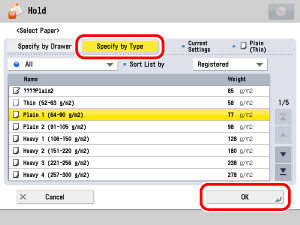
The meanings of the icons that appear on the left side of each paper type are described below:
 : : |
Paper that is registered from [Duplicate] with default settings.
|
 : : |
Paper that is registered from [Duplicate] with changed settings.
|
You can select a paper type to display from the paper type selection dropdown list.
|
[All]:
|
Displays all paper types.
|
|
[Standard Type]:
|
Displays only paper types under the Standard category.
|
|
[Custom Type]:
|
Displays only paper types under the Custom Paper category.
|
You can sort the paper type list by the registration date ([Registered]), name ([Name]) or basis weight ([Weight]).
If you want to set the margin:
Press [Gutter].
Select the desired margin type.
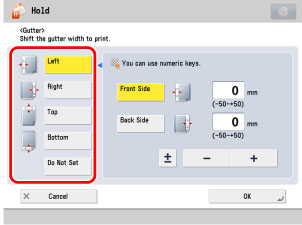
Select [Front Side] or [Back Side] → press [-] or [+] to set the margin width → press [OK].
|
NOTE
|
||||
|
If you enter a value other than 0, you can switch between the positive and negative margin widths by pressing [±].
|
If you want to shift the print area:
Press [Shift Print Area].
Press [Set] under <Front Side> or <Back Side>.
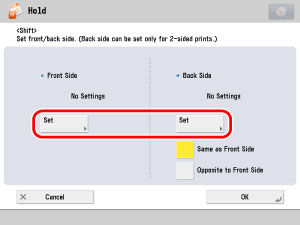
Enter the shift position using  -
-  (numeric keys) → press [OK].
 -
-  (numeric keys) → press [OK].
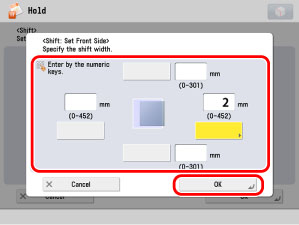
Press [OK].
|
NOTE
|
|
For more information on the modes which cannot be set in combination with this mode, see "Unavailable Combination of Functions."
If the machine automatically shuts down at the time specified in [Auto Shutdown Weekly Timer] while you are editing the job tickets, only those job tickets that have been processed up to the time when the machine shuts down are edited successfully.
|