Saddle Stitcher Unit of the Booklet Finisher-Q1 PRO
Follow the procedure described below, and the procedure that appears on the touch panel display, to remove the jammed paper.
|
NOTE
|
|
The following illustration indicates the location of the paper jam. Please refer to it to remove the jammed paper.
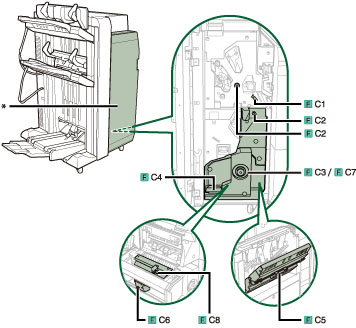 *Front Cover
|
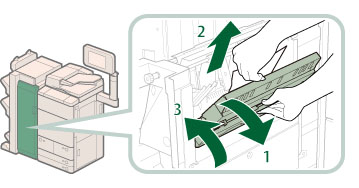
1.
Open the front cover of the finisher.

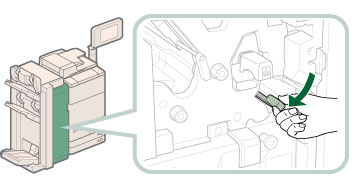
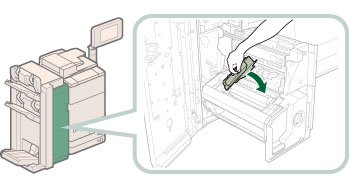
2.
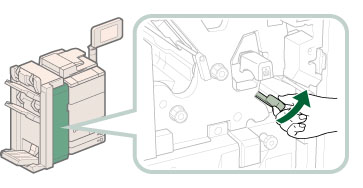
Open the guide (F-C1).
3.
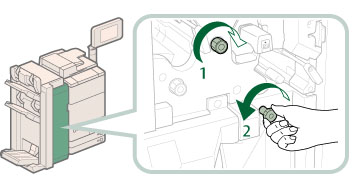
Turn the dials to feed the jammed paper to the guide (F-C1).
4.
Remove any jammed paper.
5.
Close the guide (F-C1).
 CAUTION CAUTION |
|
When closing the guide, be careful not to get your fingers caught, as this may result in personal injury.
|
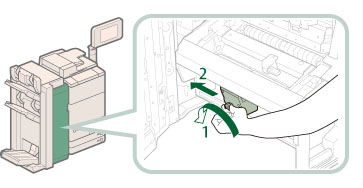
6.
If the lamp is ON, while pushing in the dial (F-C3), turn it in the direction of the arrow (clockwise) until the lamp turns off.
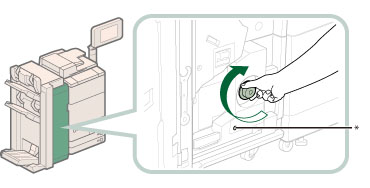
* Lamp
Turning the dial (F-C3), feed the jammed paper to the delivery guide of the booklet tray.
If the Booklet Trimmer-D1 is attached, turning the dial feeds the jammed paper to the feeding belt of the booklet trimmer.
If the lamp is OFF, proceed to step 7.
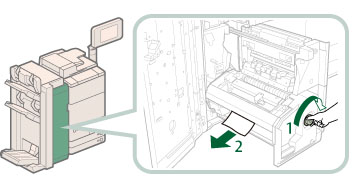
7.
Remove any jammed paper protruding from the booklet tray.
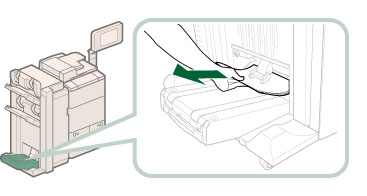
If the Booklet Trimmer-D1 is attached, remove any jammed paper protruding from the feeding belt.
8.
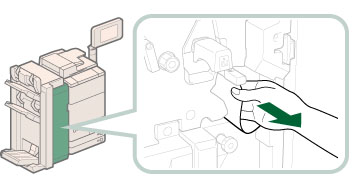
Pull out the saddle stitcher unit (F-C4).
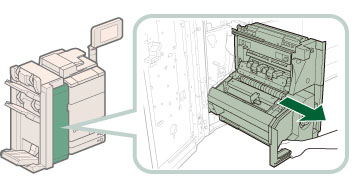
9.
Remove any jammed paper inside the saddle stitcher unit.
 |
1. Open the right cover of the saddle stitcher unit (F-C5). |
2. Remove any jammed paper. |
|
3. Close the right cover of the stitcher unit (F-C5). |
|
CAUTION |
|
When closing the cover, be careful not to get your fingers caught, as this may result in personal injury.
|
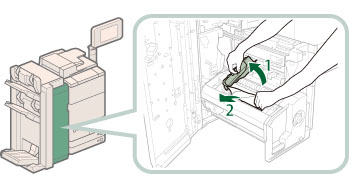
10.
Turn the dial on the pressing unit (F-C6) in the direction of the arrow (counterclockwise), and push it as far left as it will go.
 |
1. Turn the dial on the pressing unit (F-C6). |
2. Push the pressing unit (F-C6) as far left as it will go. |
If the pressing unit is in its proper position, this procedure is unnecessary.
The pressing unit is for ensuring a clean fold in the centre of the paper to create a booklet. If the pressing unit is not in its proper position, the paper to be saddle stitched cannot be fed to the booklet tray.
11.
Remove any jammed paper in the output area of the saddle stitcher unit.
 |
1. While pushing in the dial (F-C7), turn it in the direction of the arrow (clockwise) until the lamp turns off. |
2. Remove any jammed paper in the output area of the saddle stitcher unit. |
12.
While opening the delivery guide (F-C8), remove any jammed paper.
13.
Close the delivery guide (F-C8).
|
CAUTION |
|
When closing the guide, be careful not to get your fingers caught, as this may result in personal injury.
|
14.
Push the saddle stitcher unit (F-C4), and close the front cover of the finisher.
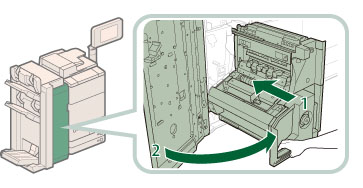 |
1. Gently push the saddle stitcher unit (F-C4) back into the machine.Always make sure to push the saddle stitcher unit in as far as it can go.
|
2. Close the front cover of the finisher. |
|
CAUTION |
|
When returning the saddle stitcher unit to its original position or closing the cover, be careful not to get your fingers caught, as this may result in personal injury.
|
15.
Follow the instructions on the touch panel display.
|
NOTE
|
|
The screen indicating the directions on how to clear the paper jam is displayed repeatedly until the paper jam is cleared.
|