Checking that a Fax was Sent Successfully
After sending a fax, you may want to check that the fax was sent successfully. In this case, it is recommended that you use the Job Done Notice mode.
Benefits of the Job Done Notice Mode
Job Done Notice
By using the Job Done Notice mode, you can be notified that the job was completed without checking the touch panel display of the machine.
By using the Job Done Notice mode, you can be notified that the job was completed without checking the touch panel display of the machine.
Storing a Record of a Sent Fax
By adding the sender's e-mail address as a destination when sending a fax, you can store a record of the sent fax.
By adding the sender's e-mail address as a destination when sending a fax, you can store a record of the sent fax.
|
Required Condition
|
|
The Send function is available for use.
E-mail settings are specified.
Fax settings are specified.
|
This section describes how to register an e-mail address, and specify the settings so that when a fax is sent, a job done notice is sent to the registered e-mail address.
The screens may differ, depending on the model of the machine and on attached optional products.
Follow the procedures below.
Registering an E-Mail Address
Job Done Notice Settings
Registering an E-Mail Address
You can perform this procedure using the touch panel display or the Remote UI.
Using the Remote UI
Using the Remote UI, you can register a destination with ease.
1.
Start your Web browser → enter the IP address of the machine in [Address].
http://<IP address of the machine>
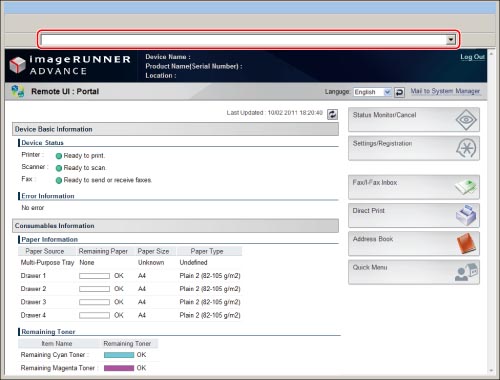
The portal page of the Remote UI is displayed.
|
NOTE
|
||||||||||
|
If you want to confirm the IP address of the machine, press
 on the control panel and follow the procedure below. on the control panel and follow the procedure below.Press  → [Preferences] → [Network] → [TCP/IP Settings] → [IPv4 Settings] → [IP Address Settings]. → [Preferences] → [Network] → [TCP/IP Settings] → [IPv4 Settings] → [IP Address Settings].If you cannot access the above settings, specify the proxy exclusion settings following the procedures below.
If the following error messages are displayed and you cannot access the Remote UI, follow the procedures below.
Page Not Found:
HTTP 404 File Not Found:
Check the IP address. Check the IP address range settings in the Network settings of the machine.
|
2.
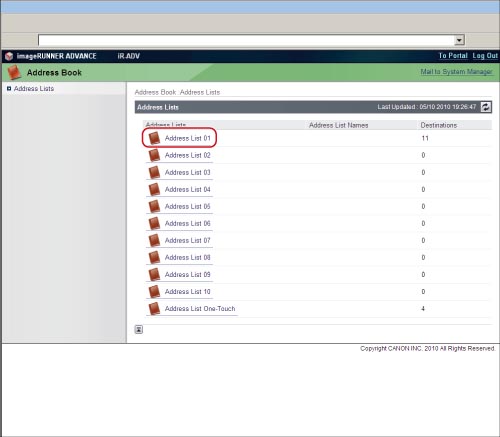
Click [Address Book] → [Address List 01] on the Address List screen.
3.
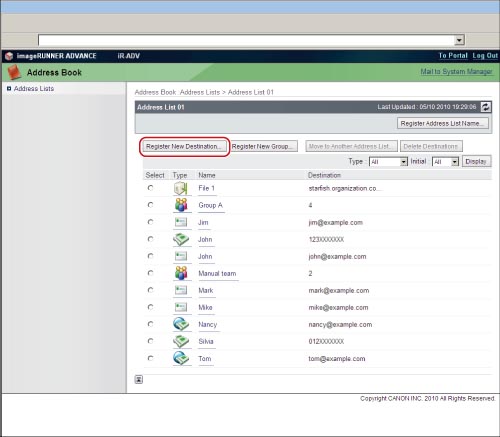
Click [Register New Destination]. A screen for registering a new destination is displayed.
4.
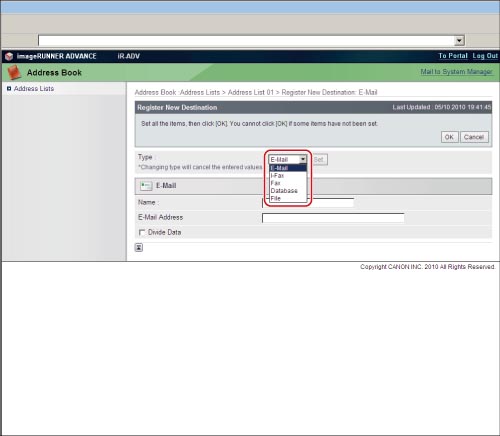
Select [E-Mail] from the [Type] drop-down list → click [Set] Enter a name and e-mail address in the [Register New Destination: E-mail] screen.
5.
Click [OK].
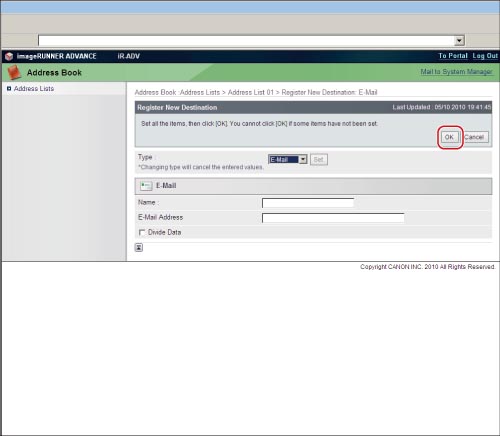
The destination you entered is registered.
Using the Touch Panel Display
You can register an e-mail address from the touch panel display.
1.
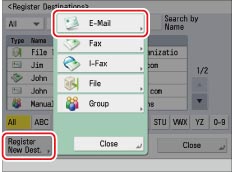
Press  → [Set Destination] → [Register Destinations] → [Register New Dest.] → [E-Mail].
 → [Set Destination] → [Register Destinations] → [Register New Dest.] → [E-Mail].
2.
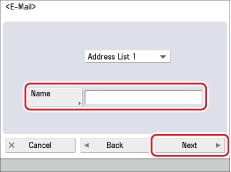
Enter a name in [Name] → press [Next].
3.
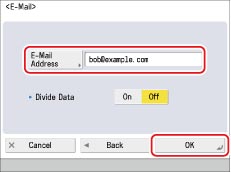
Enter an e-mail address in [E-Mail Address] → press [OK].
4.
Press [Close] → [Close].
Job Done Notice Settings
1.
Place your originals on the platen glass or in the feeder.
2.
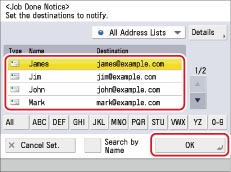
Press [Fax] on the Main Menu screen → [Options] → [Job Done Notice] → select the destination to send the Job Done Notice → press [OK] → [Close].
3.
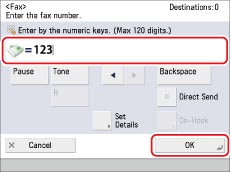
Enter the destination fax number using  -
-  (numeric keys) → press [OK].
 -
-  (numeric keys) → press [OK].
4.
Press  .
.
 .
. When the job is completed, a Job Done Notice is sent to the e-mail address registered in step 2.