Replacing the Toner Cartridge
When there is only a small amount of toner remaining inside the machine, a message appears on the touch panel display. You can continue printing, but at this time you should purchase a new toner cartridge to have it available when needed.
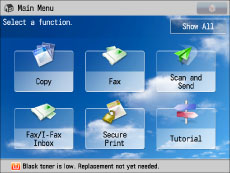
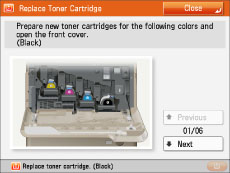
When the Black toner or all of the toners run out completely and prints can no longer be made, a screen with instructions on how to replace the toner cartridge appears on the touch panel display. Follow the procedure described below to replace the toner cartridge.
If you press [Close], you can continue operations, such as setting modes and scanning originals, even if you do not replace the toner cartridge immediately.
 WARNING WARNING |
|
Do not burn or throw used toner cartridges into open flames, as this may cause the toner to ignite, resulting in burns or a fire.
If you accidentally spill or scatter toner, carefully wipe up the loose toner with a damp, soft cloth and avoid inhaling any toner dust. Do not use a vacuum cleaner that is not equipped with safety measures to prevent dust explosions to clean up loose toner. Doing so may cause damage to the vacuum cleaner or result in a dust explosion due to static discharge.
|
|
CAUTION |
|
Keep toner out of the reach of small children.
If toner is ingested, consult a physician immediately.
If toner gets onto your hands or clothing, wash it off immediately with cold water. Washing it off with warm water will set the toner, and make it impossible to remove the toner stains.
|
|
IMPORTANT
|
|
Use only toner cartridges intended for use with this machine.
For information on the supported Canon genuine toner, see "Consumables."
Do not replace toner cartridges until the message prompting you to do so appears.
Do not attempt to replace the toner cartridge while the machine is printing.
The colour of the toner to be replaced is displayed on the touch panel display. If multiple toner cartridges must be replaced, replace the toner cartridges in the following order:Black, Yellow, Magenta, Cyan.
If you continue copying or printing in black-and-white after cyan, magenta, or yellow toner runs out, do not remove the depleted toner cartridges from the machine.
You can set the machine to display a message indicating that the remaining toner is low. (See "Displaying the Remaining Toner Error Message," and "Deleting the Remaining Toner Error Message")
|
|
NOTE
|
|
When the message <Black toner is low. Replacement not yet needed.> appears, approximately 10% of the toner is left. It is recommended that you get a new toner cartridge ready for replacement before the displayed toner color runs out.
Complete instructions on how to replace the toner cartridge can be accessed by pressing [Previous] or [Next] on the touch panel display.
If toner runs out during a print job, the remaining prints are made after you replace the toner cartridge.
If black toner is left, you can continue copying and printing in black-and-white.
After replacing toner cartridges, if printed colours are different from the colours printed before you replaced the toner cartridges, perform [Auto Adjust Gradation] in [Adjustment/Maintenance]. (See "Automatic Gradation Adjustment.")
|
1.
Press [ ].
].
].|
NOTE
|
|
If the Black toner or all of the toners run out, this step is not necessary.
|
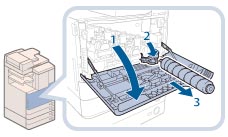
2.
Remove the displayed colour's toner cartridge.
 WARNING WARNING |
|
Do not burn or throw used toner cartridge into open flames, as this may cause the toner remaining inside the cartridges to ignite resulting in burns or a fire.
|
|
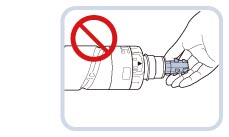
IMPORTANT
|
|
Do not touch the tip of the toner cartridge or subject it to shock by hitting it. Doing so may cause the toner cartridge to leak.
 |
3.
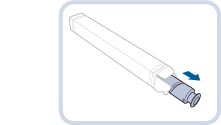
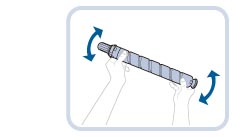
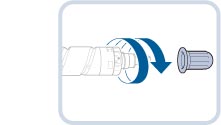
Prepare the new toner cartridge.
4.
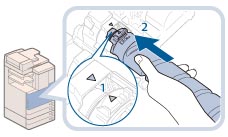
Insert the new toner cartridge.
|
NOTE
|
|
Support the new toner cartridge with your hand from underneath while pushing it into the machine with your other hand.
|
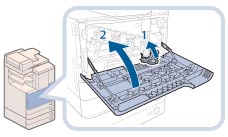
5.
Close the covers.
|
CAUTION |
|
When closing the covers, be careful not to get your fingers caught, as this may result in personal injury.
|