Printing
This section explains the basic printing method using the printer driver.
|
NOTE
|
|
Printing methods may vary according to the application you are using. For details, see the instruction manuals provided with the application.
|
1.
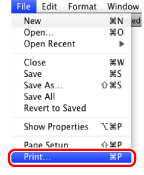
From the [File] menu of the application, select [Print].

2.
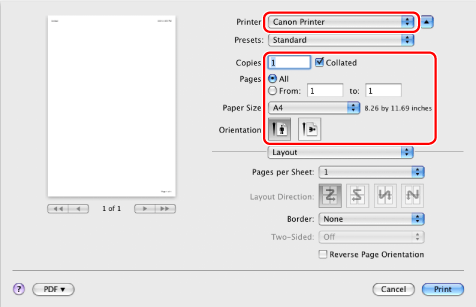
Select your printer from [Printer] → set the number of copies, which pages to print, etc.

|
NOTE
|
|
If the paper size you require is not displayed in [Paper Size], you can register a new paper size (see "Setting Custom Paper Sizes").
|
3.
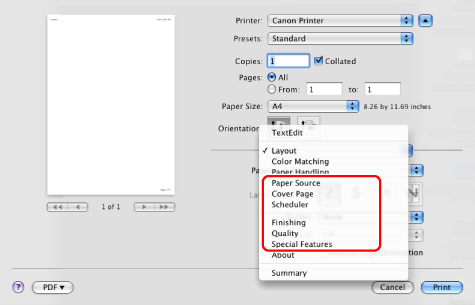
Select the appropriate preferences panes, and configure the print settings.

|
NOTE
|
|
The default setting for [Print Style] in the [Finishing] preferences pane is [2-sided printing]. For details, see "1-sided and 2-sided Printing."
For information on available printing functions, see "Printing Functions" or the online help (see "Viewing the Online Help").
|
4.
Click [Print].
Printing begins.
|
NOTE
|
|
Some printer models enable you to stop printing from a printer status confirmation/print cancelation display (see "Status Monitor/Cancel").
To stop sending data that is waiting to be output from Mac OS, click the printer icon in the Dock → click the name of the file you want to stop printing → click [Delete].
The screen may vary according to the operating system, as well as the type and version of the printer driver.
|