Installing the Drum Unit
1.
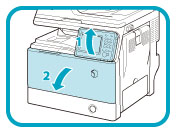
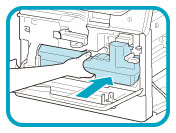
Open the front cover.
2.
Open the right cover.

|
IMPORTANT
|
|
Always open the right cover during installation to prevent damage to the drum unit.
|
3.
Turn the toner container lock lever counterclockwise 90 degrees.
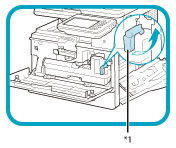
*1: Toner Container Lock Lever
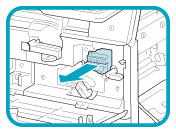
4.
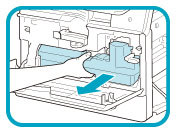
Remove the waste toner container.
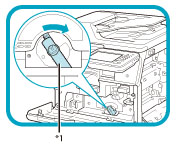
5.
Turn the drum unit lock lever counterclockwise as far as it will go.
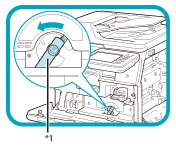
*1: Drum Unit Lock Lever
6.
Remove the cover attached to the drum insertion slot.
The removed cover is not used later on.
7.
Remove the drum unit from its protective bag.

|
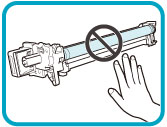
IMPORTANT
|
|
Do not touch or expose the cylindrical, blue-green part to light for a long time, as the print quality may deteriorate.
Do not expose the drum unit to direct sunlight or strong light.
Condensation (water droplets on the inside or outside) may form on the drum unit when it is brought into an environment with a sudden change in temperature or humidity.
When moving a new drum unit to a location with change in temperature, leave the drum unit in the protective bag at the new location for two or more hours to allow it to adjust to the new temperature.
 |
8.
Pull the two orange rings out and remove the protective cover.

9.
Holding the tab and the part with the blue marking, slowly insert the drum unit until it stops.
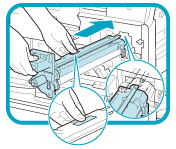
Make sure that the drum unit slides properly along the rails on the machine.
10.
Turn the drum unit lock lever clockwise to its original position.
*1: Drum Unit Lock Lever
11.
Reinsert the removed waste toner container.
12.
Turn the toner container lock lever clockwise to its original position.

*1: Toner Container Lock Lever
13.
Close the right cover.

 CAUTION CAUTION |
|
Be careful not to get your fingers caught, as this may result in personal injury.
|