External 2/3 Hole Puncher-A1 (Optional)
If a paper jam occurs inside the puncher, a screen prompting you to remove the jammed paper appears on the touch panel display. Check the location of the paper jam, and follow the procedure described below, while referring to the directions that appear on the touch panel display, to remove the jammed paper.
|
NOTE
|
|
The External 2/3 Hole Puncher-A1 is an optional product.
|
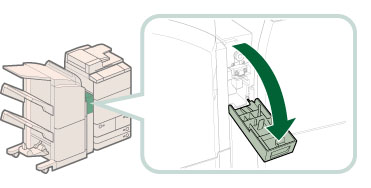
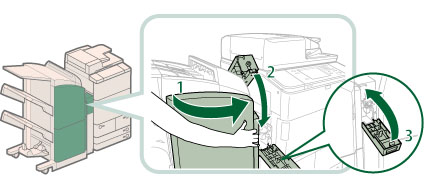
1.
Open the front cover of the puncher waste tray.
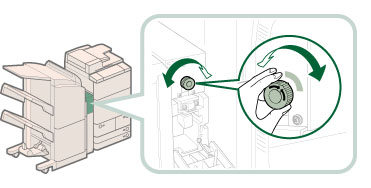
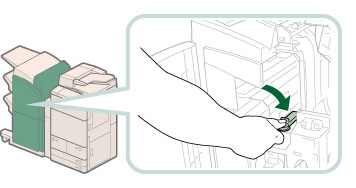
2.
Set the green knob to the fixed position.
3.
Open the front cover of the finisher.
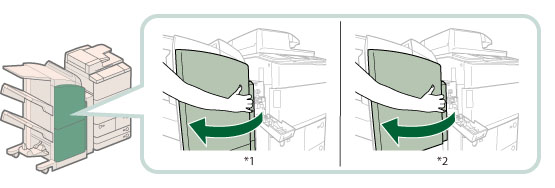
*1 Booklet Finisher-P1
*2 Staple Finisher-P1
If the Document Insertion/Folding Unit-H1 or Document Insertion Unit-L1 is attached, open the insertion unit. (See "Document Insertion/Folding Unit-H1/Document Insertion Unit-L1.")
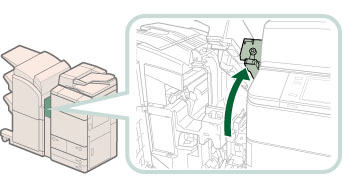
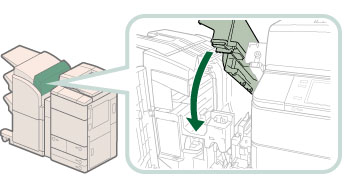
4.
Open the top cover of the finisher.
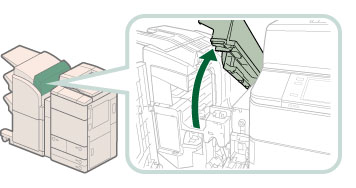
If the Document Insertion/Folding Unit-H1 is attached, lift the insertion unit.
5.
Open the delivery guide.
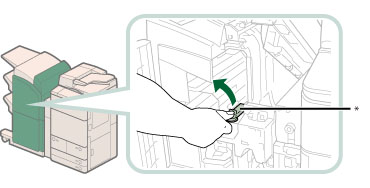
* Delivery Guide
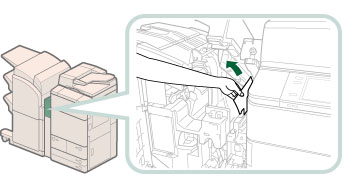
6.
Open the top cover of the puncher unit.
7.
Remove any jammed paper from the puncher unit and the finisher.
8.
Close the delivery guide.
 CAUTION CAUTION |
|
When closing the guide, be careful not to get your fingers caught, as this may result in personal injury.
|
9.
Close the top cover of the finisher.
|
CAUTION |
|
When closing the cover, be careful not to get your fingers caught, as this may result in personal injury.
|
10.
Close the covers.
|
CAUTION |
|
When closing the cover, be careful not to get your fingers caught, as this may result in personal injury.
|
11.
Follow the instructions on the touch panel display.
|
NOTE
|
|
The screen indicating the directions on how to clear the paper jam is displayed repeatedly until the paper jam is cleared.
|