Shift Tray-E1/Copy Tray-Q1 (Optional)
If a paper jam occurs inside the Shift Tray-E1/Copy Tray-Q1, a screen similar to the one shown below appears on the touch panel display. Check the location of the paper jam, and follow the procedure described below, and the procedure that appears on the touch panel display, to remove the jammed paper.
|
NOTE
|
|
The Shift Tray-E1 and Copy Tray-Q1 are optional products.
|
1.
Remove the outputted paper from the output tray.
2.
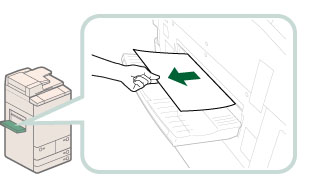
Remove any jammed paper.
If you pull the jammed paper gently and you can pull out, remove the paper.
|
IMPORTANT
|
|
If you pull jammed paper gently and fail to pull out, proceed to the next step. Do not pull out jammed paper by force, as this may leave torn pieces inside the machine and cause the machine to malfunction.
|
3.
Open the front cover of the main unit, and pull out the fixing transport unit.
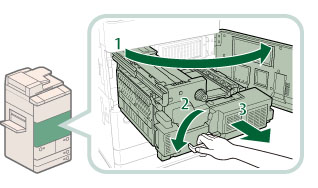 |
1. Open the front cover. |
2. Move the green lever in the direction of the arrow. |
|
3. Pull out the fixing transport unit. |
4.
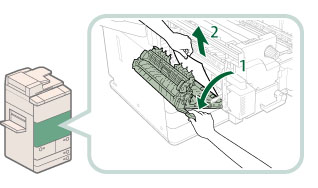
Remove any jammed paper from the left guide.
5.
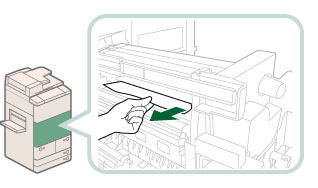
Remove any jammed paper from the fixing unit.
|
IMPORTANT
|
|
If you cannot pull out the jammed paper, proceed to the next step. Do not pull out jammed paper by force, as this may leave torn pieces inside the machine and cause the machine to malfunction.
|
6.
Remove any jammed paper from the lower guide.
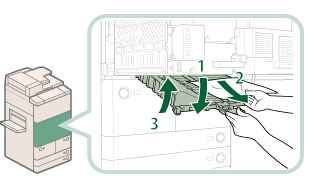 |
1. Open the lower guide, holding by the green tab. |
2. Remove any jammed paper. |
|
3. Close the lower guide. |
 CAUTION CAUTION |
|
When closing the guide, be careful not to get your fingers caught, as this may result in personal injury.
|
7.
Remove any jammed paper from the fixing unit.
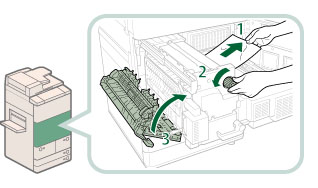 |
1. Pull the paper gently. |
2. Turn the knob to the left to remove any jammed paper. |
|
3. Close the left guide. |
 CAUTION CAUTION |
|
When closing the guide, be careful not to get your fingers caught, as this may result in personal injury.
|
8.
Push the fixing transport unit back into its original position, and close the front cover.
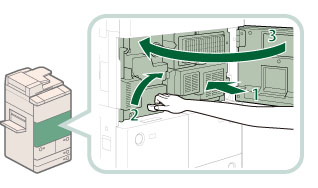 |
1. Push the fixing transport unit back into its original position. |
2. Return the green lever to its original position. |
|
3. Close the front cover. |
 CAUTION CAUTION |
|
When closing the cover and returning the unit to its original position, be careful not to get your fingers caught, as this may result in personal injury.
|
9.
Follow the instructions on the touch panel display.
|
NOTE
|
|
The screen indicating the directions on how to clear the paper jam is displayed repeatedly until the paper jam is cleared.
|
