Attaching a Cover Sheet
This section describes how to attach a cover sheet to an outgoing fax.
1.
Select [Print] from the [File] menu of the application.
2.
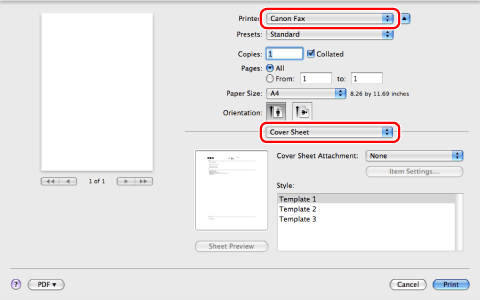
Select your fax → select [Cover Sheet].
3.
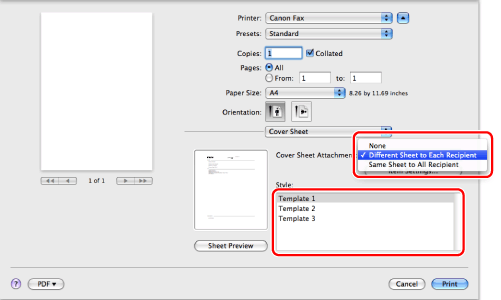
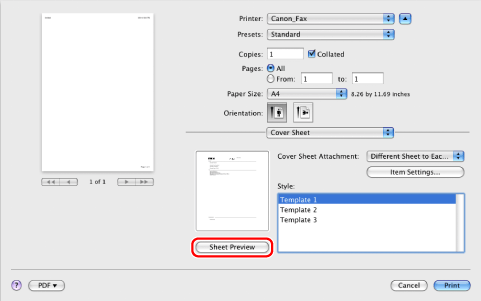
Select an option for attaching the cover sheet from [Cover Sheet Attachment] → select a cover sheet template from [Style].
4.
If you want to specify the items to include on the cover sheet, click [Item Settings].
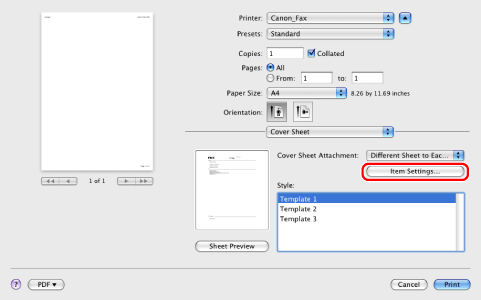
If you do not want to specify the items to include on the cover sheet, proceed to step 9.
5.
If you want to add an attention note, select [Insert Attention Note] → select a label.
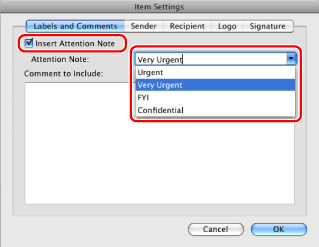
You can also enter a customized label instead of one of the pre-defined labels.
Enter any other information in [Comment to include] as necessary.
6.
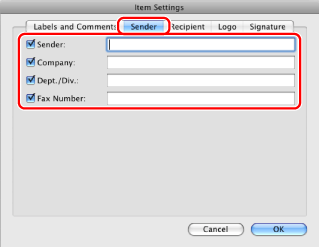
Click [Sender] → select items you want to print on the cover sheet regarding the sender → enter the information.
7.
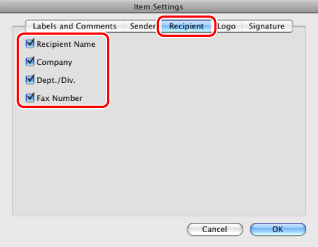
Click [Recipient] → select items you want to print on the cover sheet regarding the destination.
|
NOTE
|
|
The recipient information specified in the address book is automatically printed on the cover sheet.
|
8.
Set a logo or signature if necessary.
Click [Logo] or [Signature].
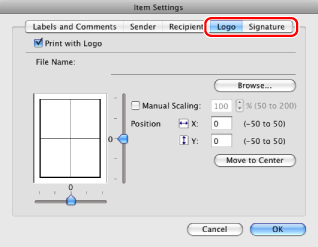
Select [Print with Logo] or [Print with Signature] to include a logo or signature on the cover sheet.
Click [Browse] → specify the magnification and position of the selected logo or signature.
Click [OK].
|
NOTE
|
|
Only BMP (bitmap) files are supported as logo or signature data. You cannot select other file formats.
|
9.
If you want to see a preview of the cover sheet you have created, click [Sheet Preview].
10.
Click [Print].
The specified cover sheet is attached to the fax when it is sent.
|
NOTE
|
|
The maximum number of recipients you can send a fax to at any one time differs depending on whether a cover sheet is attached to the fax. For details, see the online help (see "Viewing the Online Help").
The display may vary according to the operating system and system environment.
|