Configuring the Default Print Settings
This section explains how to access the printer setup screen from the [Control Panel] and how to configure the printing function settings beforehand.
The printer whose settings you have configured will print with those settings every time.
When printing, you can change these settings beforehand whenever required. To change the settings, configure them in the [Print] dialog box from the application (see "Printing").
|
IMPORTANT
|
|
To change the default print settings, you must log on to your computer as a member of the Administrators or Power Users group.
|
1.
Click [ ] (Start) → [Control Panel] → [Printer].
] (Start) → [Control Panel] → [Printer].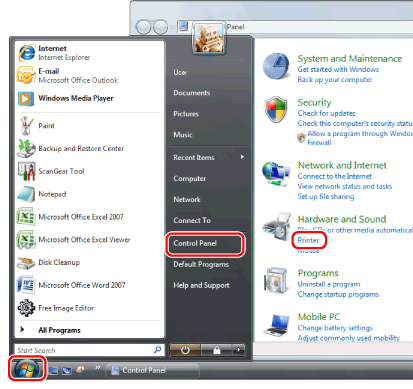
|
NOTE
|
|
For Windows 7, click [
] (Start) → [Devices and Printers].For Windows XP Professional/Server 2003, click [Start] → [Printers and Faxes].
For Windows XP Home Edition, click [Start] → [Control Panel] → [Printers and Other Hardware] → [Printers and Faxes].
For Windows 2000, click [Start] →[Settings] → [Printers].
|
2.
Right-click the icon of the printer whose settings you want to specify → click [Printing Preferences].

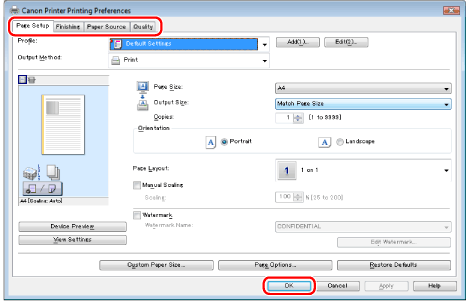
3.
Specify the desired settings in the printer driver screen → click [OK].
Click the tabs for the [Page Setup], [Finishing], [Paper Source], and [Quality] sheets, and then specify the desired items.
|
NOTE
|
|
For information on available printing functions, see "Printing Functions" or the online help (see "Viewing the Online Help").
|