
Fixing Assembly
Dirt may adhere to the fixing assembly inside the machine and cause black streaks to appear on printouts. To clean the fixing assembly, perform the following procedure. Note that you cannot clean the fixing assembly when the machine has documents waiting to be printed. To clean the fixing assembly, you need plain A4 or Letter size paper. Set the paper in the paper drawer or multi-purpose tray(Loading Paper in the Paper Drawer Loading Paper in the Multi-Purpose Tray) before performing the following procedure.
|
|
|
Paper used for cleaning can be recycled paper, color paper, or lightweight paper.
Cleaning requires toner. Make sure that there is sufficient toner remaining beforehand.Checking Toner Level
If paper that cannot be used for the cleaning sheet is registered in <Register Default Settings> in <Multi-Purpose Tray> (<Paper Settings>), set <Register Default Settings> to <Off>. Registering Default Paper Settings for the Multi-Purpose Tray
|
1
Tap <Menu>.
2
Tap <Adjustment/Maintenance>.
3
Tap <Clean Fixing Assembly>.
4
Tap <OK>.
5
Tap <Start>.
The paper selected to use for cleaning is printed.
6
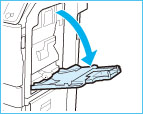
Open the multi-purpose tray.
7
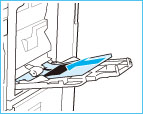
Load the cleaning sheet into the multi-purpose tray with the printed side facing up, and the arrow pointing toward the machine.
Adjust the multi-purpose tray's settings for the cleaning sheet.
8
Press  .
.
.Cleaning starts. The <Finished.> message is displayed approximately 30 seconds later.