In the Paper Drawer
|
Before loading paper in the paper drawer, see "Attention (Loading Paper)."
|
|
NOTE
|
|
How to load the paper in the optional paper drawer (Drawer 2): Same as in Drawer 1.
|
1
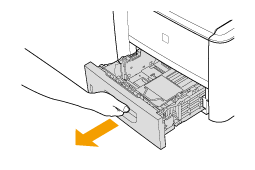
Pull out the paper drawer.
2
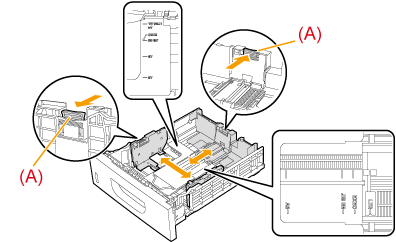
Slide the paper guides to the size mark for the paper to be loaded.
While holding the lock release lever (A), adjust the length of the paper guide.
 |
If you want to change the size of the paper to be loaded, be sure to register the paper size in "Setting the Paper Size and Type."
|
3
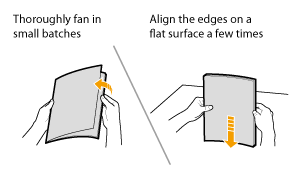
Fan the document stack and even the ends.
4
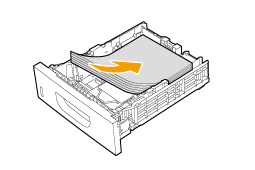
Load the paper with the printing side down so that it aligns with the rear side of the paper drawer.
Load the paper in portrait orientation.
|
NOTE
|
When loading paper with a letterhead or logoSee "Paper Loading Orientation," and load the paper in the proper orientation.
|
5
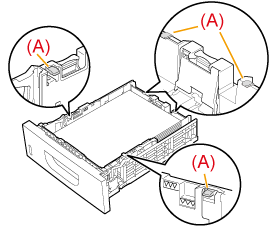
Hold down the paper, then set it under the hooks (A) on the paper guides.
|
IMPORTANT
|
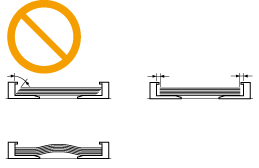
Adjust the paper guides to the paper width without space.If the paper guides are loose or tight, this may result in misfeeds or paper jams.
 |
6
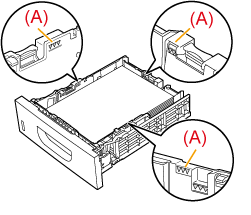
Make sure that the paper stack does not exceed the line of the load limit mark (A).
 |
Make sure that the paper stack does not go over the line of the load limit mark. If the paper stack goes over the load limit mark lines, this may result in misfeeds.
|
7
Insert the paper drawer into the machine.
 |
If <Confirm Paper Settings> is set to <On>, a confirmation screen appears when the paper drawer is set in the machine.
|
8
Specify the loaded paper size and type.