Preparing to Use the Toner Cartridge
|
See "Attention (Preparing to Use the Toner Cartridge)" in advance.
|
After removing the packing materials from the machine, remove the packing materials from the toner cartridge.
 |
The toner cartridge is pre-installed in the machine.
|
1
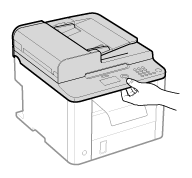
Hold the operation panel.
2
Lift the scanning platform.
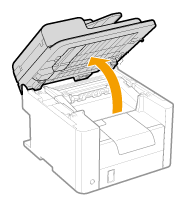
 If you cannot lift the scanning platform: If you cannot lift the scanning platform: |
|
Make sure that the feeder or the platen glass cover is completely closed.
Do not try to forcefully lift the scanning platform as this may damage the machine.
|
3
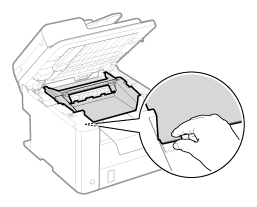
Hold the grip on the left front side of toner cover.
4
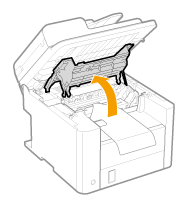
Open the toner cover.
5
Turn the sheet to the back.
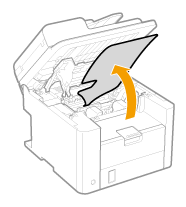
6
Remove the packing materials.
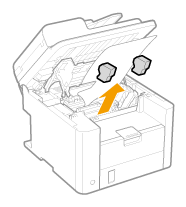
7
Remove the toner cartridge.
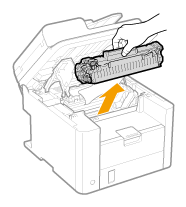
8
Remove the packing material as the figure below.
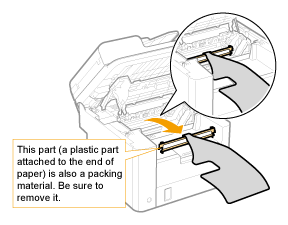
9
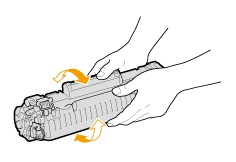
Gently shake the toner cartridge from side-to-side five to six times to evenly distribute the toner.
10
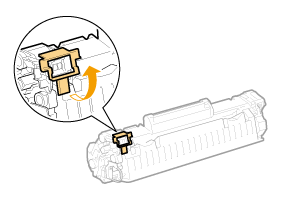
Remove the packing material as the figure below.
11
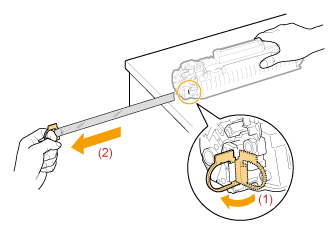
Place the toner cartridge on a flat surface.
12
Lift the tab, and then pull the sealing tape completely out (approximately 20" (50 cm)).
13
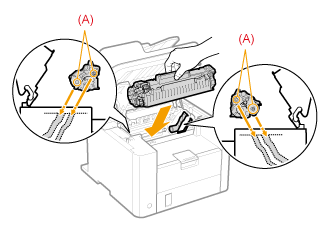
Insert the toner cartridge.
Fit the protrusions (A) on each side of the toner cartridge into the guides located on each side of the machine. Slide the toner cartridge into the machine, until the toner cartridge meets the back of the machine.
14
Close the toner cover.
 If you cannot close the toner cover: If you cannot close the toner cover: |
|
Make sure that the toner cartridge is properly installed in the machine.
Do not try to forcefully close the toner cover, as this may damage the machine.
|
15
Lower the scanning platform.
|
Check!
|
To remove the packing materials:Make sure that the following packing materials are all removed from the machine:
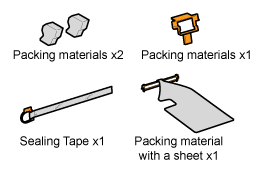 |
 "
"