Printing
This section explains the basic printing method using the printer driver.
|
NOTE
|
|
Printing methods may differ depending on the application you are using. For details, see the instruction manuals provided with the application.
The display may differ according to the operating system, as well as the type and version of the printer driver.
The machine may not be able to print data such as color photos if the data size of a single page is too large. If such is the case, reduce the data size by lowering the resolution or by changing the file format.
In Windows 8, when printing from the Windows Store app, if you have previously selected settings that require input or a procedure when printing such as secure printing, edit + preview, department ID management, etc., the message [The printer requires your attention. Go to the desktop to take care of it.] is displayed. If this happens, move to the desktop and follow the instructions in the displayed dialog box.
|
1.
Open the document you want to print from the application.
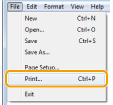
2.
Select [Print] from the [File] menu.
|
NOTE
|
|
In Windows 8, if you want to print from the Windows Store app, display the charm bar to the right of the screen, and tap [
 ] (Devices) → the printer you are using → [Print]. When you print in this way, you can only set some of the print functions. ] (Devices) → the printer you are using → [Print]. When you print in this way, you can only set some of the print functions. |
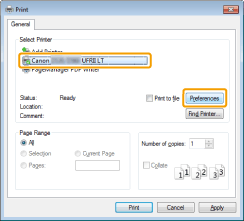
3.
Select your printer from [Name] -> click [Preferences] (or [Properties]).
4.
Specify the desired settings in the printer driver screen -> click [OK].
Click the tabs, and then specify the desired items.

|
NOTE
|
|
The [Basic Settings] tab comprises a few of the basic settings of the driver. The settings that you can configure in the [Basic Settings] tab can also be configured in other tabs.
The default setting for [Print Style] in the [Finishing] tab is [2-sided printing]. For details, see "1-sided Printing and 2-sided Printing ."
For information on available printing functions, see "Printing Functions" or the online help. (See "Viewing the Online Help.")
|
5.
Click [Print] (or [OK]).
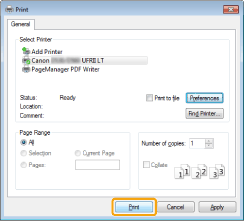
Printing begins.