Poster Printing
You can enlarge a one-page image and print it over multiple pages. You can then glue the printed pages together to create a poster.
|
NOTE
|
|
[Poster Printing] can be selected under the following conditions:
[1-sided Printing] is selected from [Print Style] in the [Finishing] tab. For details, see "1-sided Printing and 2-sided Printing."
[Auto] or [Enabled] is selected from [Spooling at Host] in the [Device Settings] tab. For instructions on how to display the [Device Settings] tab, see "Setting the Printer Options."
|
1.
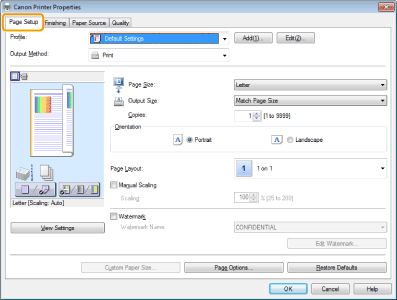
Click [Page Setup].

For instructions on how to display the printer driver screen, see "Printing" or "Configuring the Default Print Settings."
2.
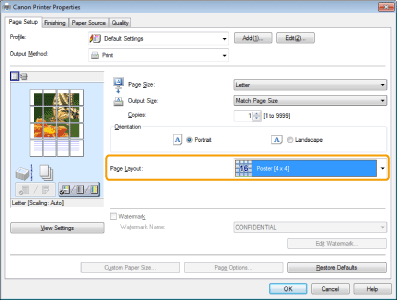
Select [Poster [N x N]] (N = 2, 3, or 4) from [Page Layout].

The output image is displayed in the preview area.
|
NOTE
|
|
If you cannot select the options for [Page Layout], display the [Device Settings] tab, and then select [Auto] or [Enabled] from [Spooling at Host]. For instructions on how to display the [Device Settings] tab, see "Setting the Printer Options."
|
3.
Click [OK].
|
NOTE
|
|
When outputting the pages face-up, the print sequence for the pages (the sheets into which the image is divided) starts from the top left proceeds to the right. When outputting the pages face-down, the sequence starts from the bottom right and proceeds to the left.
2-sided printing is not supported when performing poster printing. Switch to 1-sided printing.
Poster printing cannot be used together with "Watermark Printing", "Scaling Documents", or "Printing Multiple Pages on One Sheet."
The display may vary according to the operating system, as well as the type and version of the printer driver.
|