Specifying the Setting for Job Log Display
You can specify the setting for Job Log Display using a Web browser (Remote UI).
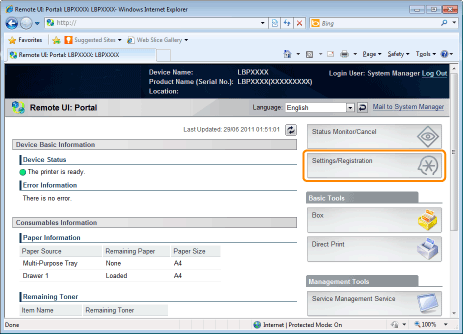
1
Start the Remote UI, and then log in as Administrator.
2
Click [Settings/Registration].
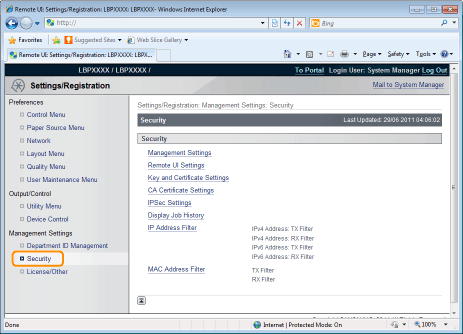
3
Select [Security] from the [Management Settings] menu.
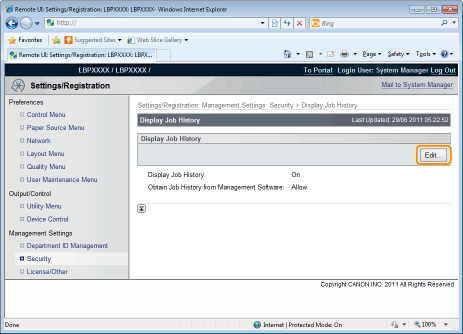
4
Click [Display Job History].

5
Click [Edit...].
6
Specify whether the printer should display the job logs.
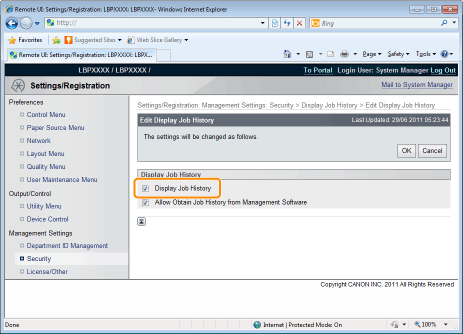
If the [Display Job History] check box is selected, you can display the job logs*.
If the [Display Job History] check box is cleared, the job logs* are not displayed.
|
*
|
The [Job History] page in the [Status Monitor/Cancel] menu
|
7
Select whether to permit management software to obtain job logs.
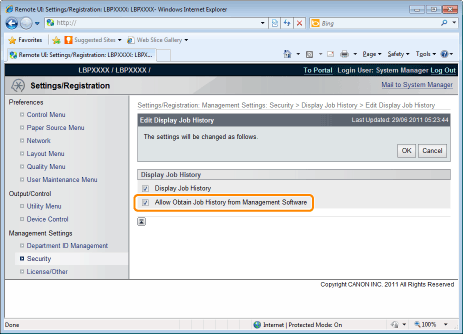
If the [Allow Obtain Job History from Management Software] check box is selected, you can obtain the job logs from management software.
If the [Allow Obtain Job History from Management Software] check box is cleared, job logs cannot be obtained from management software.
|
NOTE
|
If the [Display Job History] check box is selectedThe [Allow Obtain Job History from Management Software] check box is selected automatically.
|
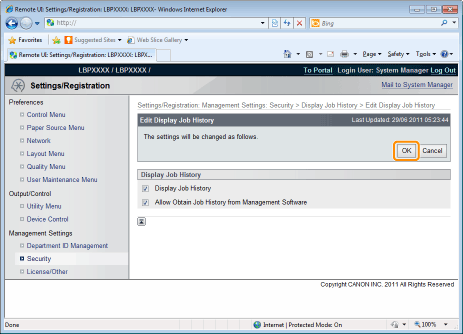
8
Click [OK].
9
Perform a hard reset or restart the printer.
→ After performing a hard reset or restarting the printer, the settings are effective.
|
NOTE
|
To perform a hard resetYou can perform a hard reset using the following procedure.
1. Click [Settings/Registration]. 2. Select [Device Control] from the [Output/Control] menu. 3. Select [Hard Reset], and then click [Execute]. |