How to Specify the Settings for E-mail Print
|
Before performing the setup, see "Attention (How to Specify the Settings for E-mail Print)."
|
This section describes the procedures for registering or changing the settings using a Web browser (Remote UI).
1
Start the Remote UI, and then log in as Administrator.
2
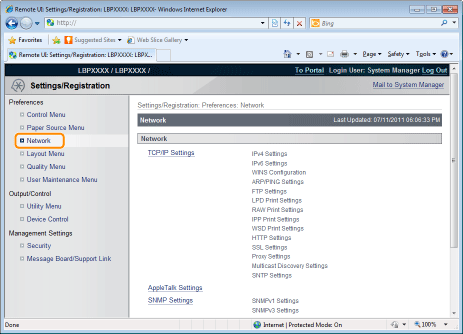
Click [Network] under [Preferences] in the [Settings/Registration] menu.
3
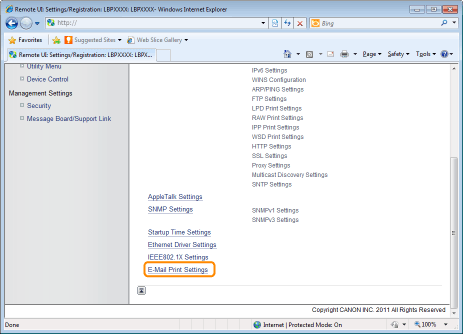
Click [E-Mail Print Settings].
4
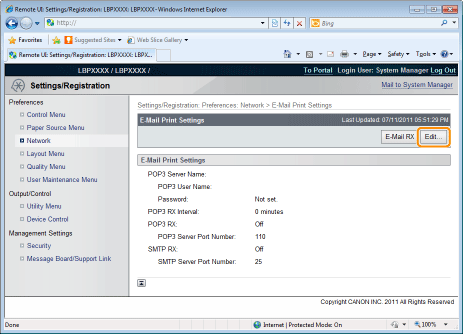
Click [Edit...] on the right side of [E-Mail Print Settings].
5
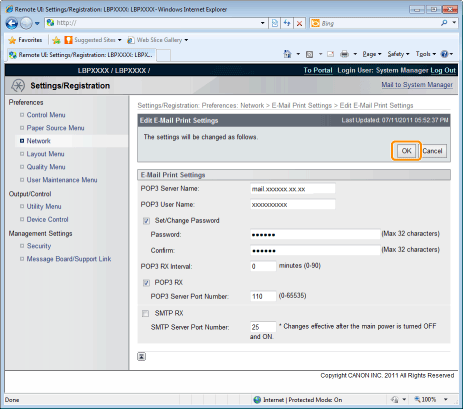
Specify the settings for the e-mail print function.
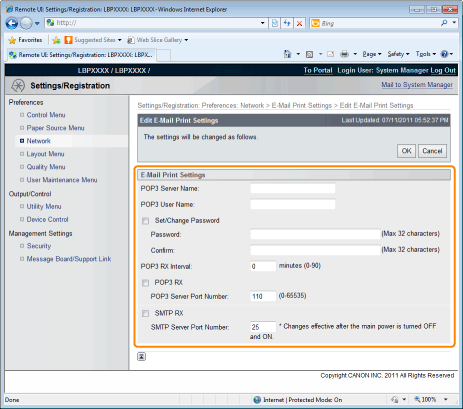
If you want to use the POP3 protocol
|
[POP3 Server Name]
|
Specifies the name or sets the IP address of the server which receives e-mails.
|
|
[POP3 User Name]
|
Specifies the name of the user which receives e-mails.
You can enter up to 32 alphanumeric characters.
|
|
[Set/Change Password]
|
Specifies the password for the name of the user which receives e-mails.
|
|
[Password]
|
Select the check box when setting/changing the password.
You can enter up to 32 alphanumeric characters.
|
|
[Confirm]
|
For confirmation, enter the same [Password] again.
|
|
[POP3 RX Interval]
|
Set the interval for automatically connecting to the server that receives e-mail in minute units.
Receive e-mail at specified intervals and print it automatically.
You can set from [0] (minutes) to [90] (minutes).
When it is set to [0], it does not automatically receive e-mail from the server.
When it is set to [0] and when you want to connect to the server before it automatically connects to the server that receives e-mail, you can receive e-mail manually.
|
|
[POP3 RX]
|
Specifies whether to enable the e-mail print function.
|
|
[POP3 Server Port Number]
|
Specifies the port number for the server which receives e-mails. You can specify the port number between [0] and [65535].
|
If you want to use the SMTP protocol
|
[SMTP RX]
|
When it is checked, e-mail is relayed using SMTP protocol and it is automatically received and printed.
|
|
[SMTP Server Port Number]
|
Specifies the port number for the server which receives e-mails. You can specify the port number between [0] and [65535].
|
6
Click [OK].
