Printing the PDF File Using the Direct Print Function
1
Start the Remote UI.
2
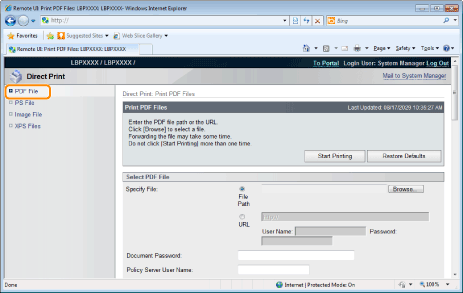
Select [PDF File] from the [Direct Print] menu.
3
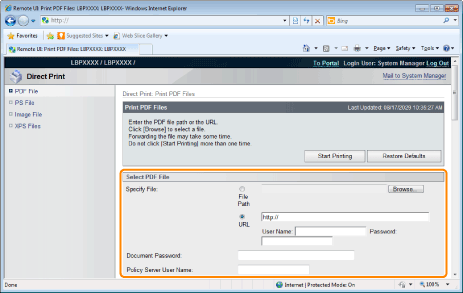
Specify [Select PDF File].
When specifying [File Path]
Click [Browse...], select the file, and then click [Open...].
When specifying [URL]
Enter the URL of the PDF file that you want to print.
 |
If you specify a URL that requires user authentication, enter [User Name] and [Password].
|
 |
When specifying a URL and printing, the next print job cannot be performed until the PDF is finished downloading or the connection with the Web server is terminated.
|
 |
The protocol for specifying a URL and printing only supports HTTP.
|
4
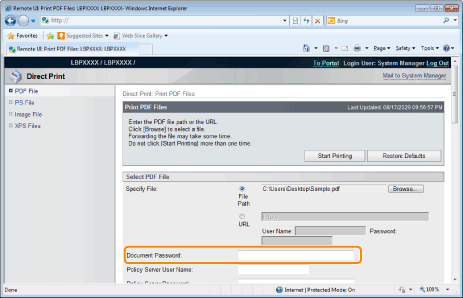
Enter the password in [Document Password] when a password is specified for opening the document or when it is necessary to enter a password to print.
 |
If printing is attempted without entering a password, <Cannot decode PDF data.> is displayed, and printing is cancelled. When printing PDF files with settings that do not allow them to be printed or when printing in high resolution PDF files with settings that only allow them to be printed in low resolution, enter the master password.
|
 |
When you print a PDF file linked to a policy server, enter [Policy Server User Name] and [Policy Server Password].
|
5
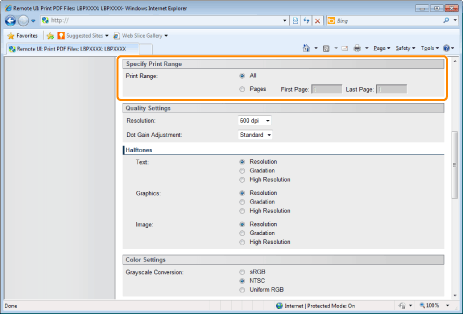
Specify the setting for [Specify Print Range].
|
[All]
|
Select if you want to print all the pages.
|
|
[Pages]
|
Select [Pages], and then enter the starting page number and ending page number if you want to specify the print range.
|
6
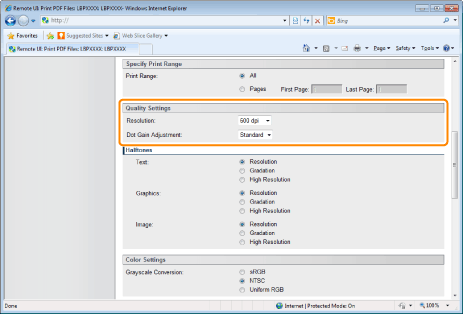
Specify the settings for [Quality Settings] as the following, as needed.
|
[Resolution]
|
Specify the resolution for printing the data. It is effective to set [600 dpi] when printing photographs at standard quality, and to set [1200 dpi] when printing at a higher quality.
|
|
[Dot Gain Adjustment]
|
You can adjust dotted areas to change darkness and lightness of painted areas. A higher number specifies a darker printed area.
|
7
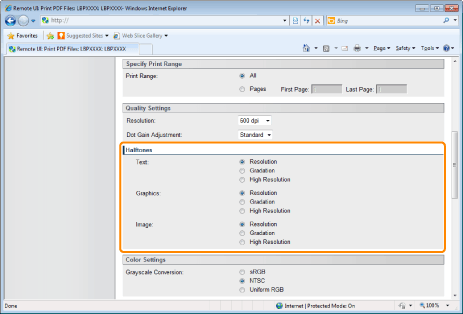
Specify the settings for [Halftones] as the following, as needed.
|
[Halftones]
|
Specify the halftone display method when printing.
You can set it for these data types: [Text], [Graphics] or [Image].
|
8
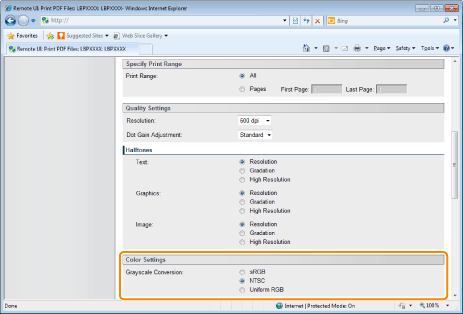
Specify the settings for [Color Settings] as the following, as needed.
|
[Grayscale Conversion]
|
Select the method for converting color print data to grayscale for printing.
This setting is for converting color data to B&W data.
|
9
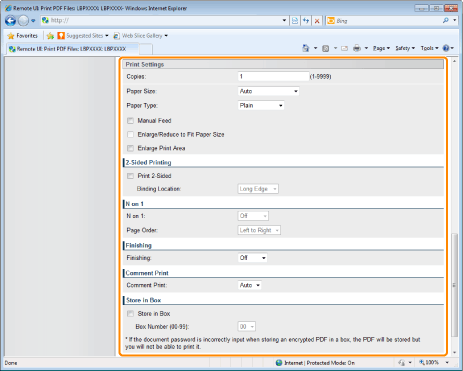
Specify the settings for [Print Settings] as the following, as needed.
|
[Copies]
|
Specify the number of copies to be printed.
|
||||
|
[Paper Size]
|
Specify the size of paper to print.
If data is input that is outside the engine's maximum and minimum paper size range when the paper size is automatic, it is printed on the paper size that is set with [Standard Paper Size].
|
||||
|
[Paper Type]
|
Specify the type of paper to print.
|
||||
|
[Manual Feed]
|
You can fix the paper source in the multi-purpose tray.
|
||||
|
[Enlarge/Reduce to Fit Paper Size]
|
If the check box is selected, it fixes the aspect ratio and scales it to fit with the effective print area of the paper size that is set and prints. However if [Paper Size] is set as [Auto], this item cannot be set.
|
||||
|
[Enlarge Print Area]
|
Specify whether to expand the printable area and print.
Depending on the document to be printed, part of the edges of the paper may not be printed.
|
||||
|
[Print 2-Sided]
|
Specify 1-sided or 2-sided printing.
|
||||
|
[Binding Location]
|
Set the binding position on the long side of the paper (long-edged binding) or the short side of the paper (short-edged binding). If binding is set from the printer side, the position of the "gutter" is automatically adjusted on the front and back sides of the paper.
|
||||
|
[N on 1]
|
You can print multiple pages of the PDF file data arranged on one page.
When printing multiple pages side by side, set [Paper Size] to a setting other than [Auto].
|
||||
|
[Page Order]
|
The [N on 1] setting enables you to set the order the pages will be arranged on the paper when printing multiple pages on one page.
|
||||
|
[Finishing]
|
(It is only displayed when an SD card is used.)
It collates and prints in page or section units.
|
||||
|
[Comment Print]
|
Specify whether to print the notes of PDF files.
|
||||
|
[Store in Box]
|
(It is only displayed when an SD card is used.)
When storing it in a box, check the [Store in Box] check box before selecting the box where you want to store it.
|
10
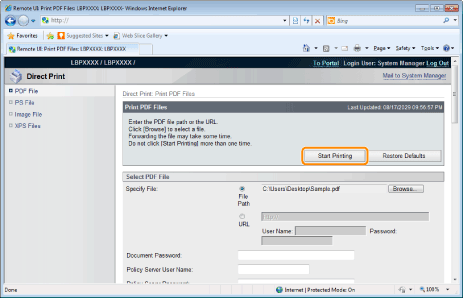
Click [Start Printing].
 |
Do not keep clicking [Start Printing] while the file is transferring. Sometimes it takes time to transfer a file, but if you keep clicking during the transfer, a file failure may occur and it may be impossible to transfer it.
|
|
→
|
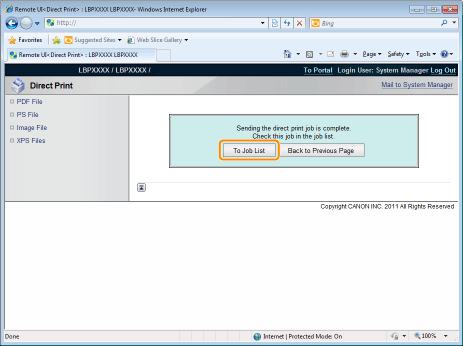
When the print job has finished sending, the display switches and the following message is displayed.
|
 Press [To Job List] to check the print job that was sent.
|
