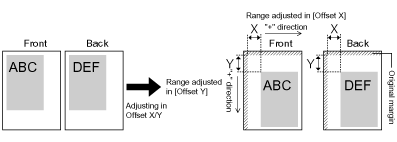
Adjusting the Printing Position for All the Jobs
Perform [Offset Y] and [Offset X] using the control panel of the printer.
|
IMPORTANT
|
Confirm the adjustment result.If any part of the print image lies outside the printable area after adjusting the printing position, the part will be missing in the print result.
|
|
NOTE
|
Adjustable areaYou can adjust the printing position between -50.0 mm and +50.0 mm for both the vertical direction and horizontal direction.
|
1
Press [  ] (
] ( Settings).
] (Settings).2
Select [Layout] using [  ] and [
  ], and then press [OK].
] and [ ], and then press [OK].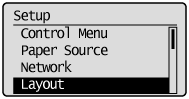
3
Select a position you want to correct.
If specifying the setting for [Offset Y]
|
1.
|
Select [Offset Y] using [
] and [ ], and then press [OK].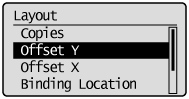 |
||
|
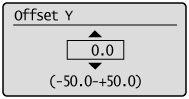
2.
|
Specify the target numeric value using [
] and [ ], and then press [OK].Each time you press [
], the setting value increases by 0.5 mm, and each time you press [ ], the setting value decreases by 0.5 mm. Also, if you keep pressing [ ] or [ ] without releasing your finger, you can keep increasing or decreasing the value.
 |
If specifying the setting for [Offset X]
|
1.
|
Select [Offset X] using [
] and [ ], and then press [OK].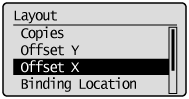 |
||
|
2.
|
Specify the target numeric value using [
] and [ ], and then press [OK].Each time you press [
], the setting value increases by 0.5 mm, and each time you press [ ], the setting value decreases by 0.5 mm. Also, if you keep pressing [ ] or [ ] without releasing your finger, you can keep increasing or decreasing the value.
 |