Installing with Plug and Play
1
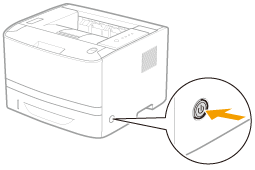
Connect the USB cable.
2
Turn the printer ON.
3
Turn the computer on, and then log on to Windows as a user with administrative rights.
|
→
|
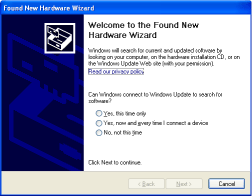
A wizard or dialog box appears through the Plug and Play automatic setup.
 |
 If the printer driver is installed automatically If the printer driver is installed automaticallyIf you installed the printer driver for this printer previously, the driver is installed automatically.
If you want to update the printer driver (or want to install it manually), install the printer driver after uninstalling it once.
If the following screen appears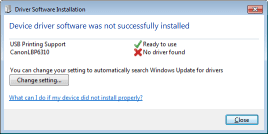 You may not be able to install the printer driver properly due to the Windows restriction even after detecting the printer with Plug and Play. Click [What can I do if my device did not install properly?], and then see Windows Help or reinstall the printer driver in "Easy Installation."
|
4
Follow the on-screen instructions to install the printer driver.
|
NOTE
|
||
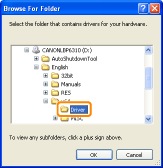
When selecting the file or folder in which the printer driver is included.Select one of the following file and folders.
     For a 32-bit operating system
Select the folders in the supplied CD-ROM: [English] - [32bit] - [Driver].
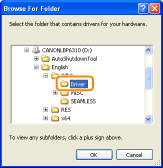 For a 64-bit operating system
Select the folders in the supplied CD-ROM: [English] - [x64] - [Driver].
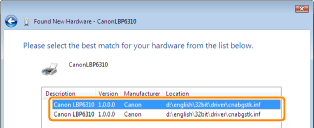
If the screen for selecting the printer driver appearsEven if which printer driver is selected, there is no problem with the installation because the same printer driver is installed.
 |

|
When the installation is complete, an icon and folder for this printer will be created.
 "After Installation" "After Installation" |