Restricting the Users Who Can Monitor/Change the Settings Using the SNMP Protocol
This section describes the procedure for specifying the settings using the Remote UI. To specify the settings using FTP Client, see "FTP Client."
1
Start the Remote UI, and then log in as Administrator.
2
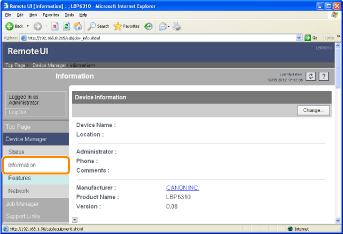
Select [Information] from the [Device Manager] menu.
3
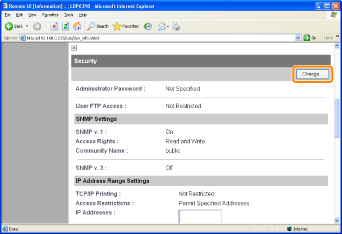
Click [Change] under [Security].
4
Configure the SNMP v. 1 protocol.
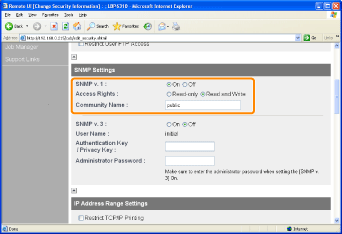
If you want to use the SNMP v. 1 protocol
|
1.
|
Set [SNMP v. 1] to [On].
|
||
|
2.
|
For [Access Rights], select in which mode the SNMP v. 1 agent can operate, [Read-only] or [Read and Write].
|
||
|
3.
|
Specify the community name of SNMP in [Community Name].
|
If you do not want to use the SNMP v. 1 protocol
Set [SNMP v. 1] to [Off].
 |
If [Off] is specified, you may not be able to use the Canon utility software.
Consult your network administrator before selecting [Off].
|
5
Configure the SNMP v. 3 protocol.
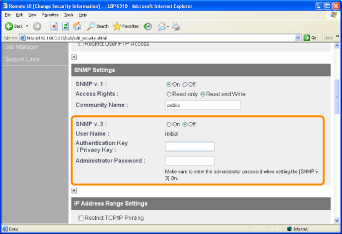
If you want to use the SNMP v. 3 protocol
|
1.
|
Set [SNMP v. 3] to [On].
|
||
|
2.
|
Specify the authentication key or privacy key to be used in SNMP v. 3 in [Authentication Key/Privacy Key].
|
||
|
3.
|
Enter the administrator password for the Remote UI in [Administrator Password].
|
If you do not want to use the SNMP v. 3 protocol
Set [SNMP v. 3] to [Off].
 If the SNMP v. 3 protocol settings are not displayed If the SNMP v. 3 protocol settings are not displayedIf you change the settings for the SNMP v. 3 protocol using software other than the Remote UI, the settings are not displayed in the Remote UI.
To display the settings again, reset the network settings to the default values.
 "Initializing the Network Settings" "Initializing the Network Settings" |
6
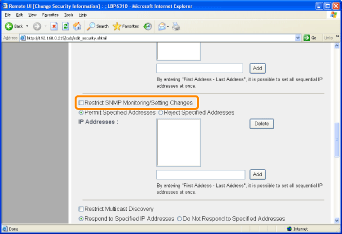
Select the [Restrict SNMP Monitoring/Setting Changes] check box.
7
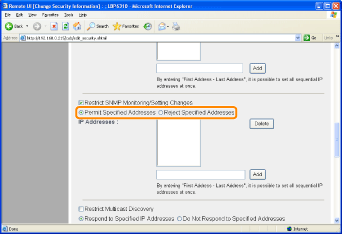
Select [Permit Specified Addresses] or [Reject Specified Addresses].
|
[Permit Specified Addresses]
|
Only users specified in [IP Addresses] can monitor and change the settings.
|
|
[Reject Specified Addresses]
|
Users specified in [IP Addresses] cannot monitor and change the settings.
|
8
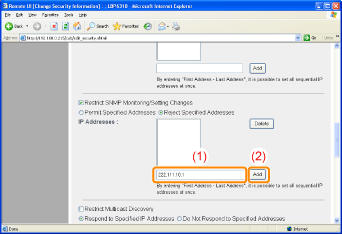
Set the IP address.
|
(1)
|
Enter the IP address of a computer for which you permit or reject monitoring and changing the settings using the SNMP protocol.
|
||
|
(2)
|
Click [Add].
|
You can also enter IP addresses as follows.
|
Input Example of the IP Addresses
|
Method for Entering IP Addresses
|
|
AAA.BBB.CCC.15-AAA.BBB.CCC.18
|
If you want to enter the IP addresses of consecutive numbers, place "-" (hyphen) between the address of the smallest number and that of the largest number.
The example on the left is equivalent to entering addresses from AAA.BBB.CCC.15 to AAA.BBB.CCC.18.
|
|
AAA.BBB.CCC.*
|
Entering "*" (asterisk) is equivalent to entering the numbers from 0 to 255.
The example on the left is equivalent to entering addresses from AAA.BBB.CCC.0 to AAA.BBB.CCC.255.
|
 |
You can set IP addresses of up to 255 characters.
|
|
<Counting example of the number of characters>
"192.168.0.215" = 13 characters
"192.168.0.215-192.168.0.218" = 27 characters
|
|
NOTE
|
||||
When deleting a set IP address
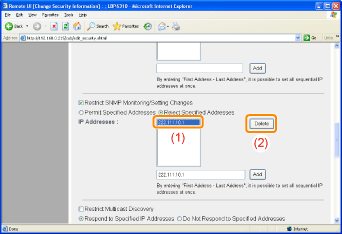 |
9
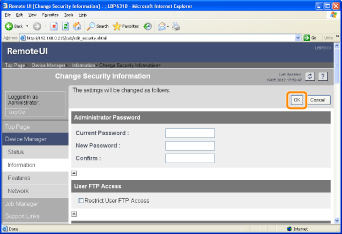
Click [OK].
