Configuring the Print Server
|
Before configuring the print server, check the settings of your network environment.
|
1
Open the printer folder.
2
Display the [Sharing] sheet.


Right-click the icon for this printer, and then select [Sharing] from the pop-up menu.


|
1.
|
Right-click the icon for this printer, and then select [Printer properties] from the pop-up menu.
|
|
2.
|
Display the [Sharing] sheet.
|
3
Perform the following procedure.

Select [Share as]. Change [Share name] as needed.


Select [Share this printer]. Change [Share name] as needed.


Select the [Share this printer] check box. Change [Share name] as needed.
 |
Do not use spaces or special characters for the share name.
|
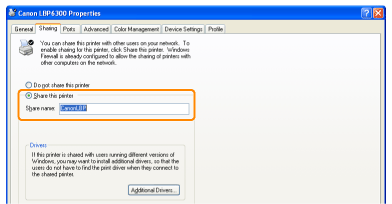
 If [Change sharing options] appears If [Change sharing options] appearsClick [Change sharing options].
 If the [User Account Control] dialog box appears, click [Continue].
|
|
Next, install the additional driver using the following procedure.
|
4
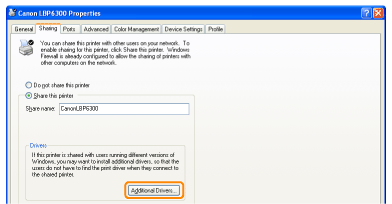
Insert the supplied CD-ROM "LBP6300 User Software" into the CD-ROM drive of your computer, and then click [Additional Drivers].
If CD-ROM Setup appears, click [Exit].
5
Select the additional driver.
|
(1)
|
Select the additional driver.*
|
|
(2)
|
Click [OK].
|

|
*
|
Select the additional driver as follows according to the operating system on the print server.
|
 If you are not sure whether you are using a 32-bit operating system or 64-bit operating system (Windows Vista, 7, and Server 2008) If you are not sure whether you are using a 32-bit operating system or 64-bit operating system (Windows Vista, 7, and Server 2008) |
6
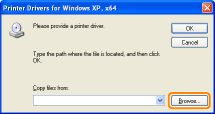
Click [Browse].
7
Open the folder in which the printer driver is included.
If a 32-bit operating system is running on the print server
Open the folders in the supplied CD-ROM: [English] - [x64] - [Driver].
If a 64-bit operating system is running on the print server
Open the folders in the supplied CD-ROM: [English] - [32bit] - [Driver].
8
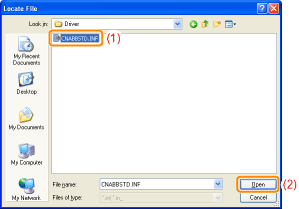
Open the INF file.
|
(1)
|
Select the INF file.
|
|
(2)
|
Click [Open].
|
9
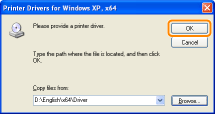
Click [OK].
|
→
|
Installation of the additional driver starts. Wait until the following screen disappears.
 |
 If the [User Account Control] dialog box appears If the [User Account Control] dialog box appearsClick [Yes].
|
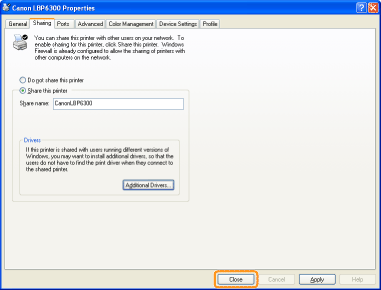
Click [Close] or [OK].
|
→
|
The printer icon changes to the shared printer icon.
     |
|
IMPORTANT
|
||
To clear the printer sharing settingsClear it using the following procedure.
 Select [Not shared] in the [Sharing] sheet.   Select [Do not share this printer] in the [Sharing] sheet.    Clear the [Share this printer] check box in the [Sharing] sheet.
|
 "
"