Enabling the Remote UI
This section describes the procedure for enabling the Remote UI using the Printer Status Window.
1
Click [  ] in the Windows taskbar, and then select the printer name.
 ] in the Windows taskbar, and then select the printer name.
2
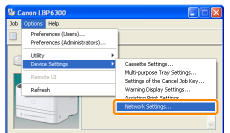
From the [Options] menu, select [Device Settings] → [Network Settings].

3
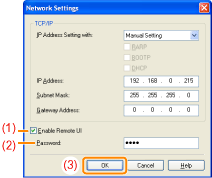
Enable the Remote UI.
|
(1)
|
Select the [Enable Remote UI] check box.
|
||
|
(2)
|
Enter the administrator password for the printer (the password that is specified in the Remote UI).
|
||
|
(3)
|
Click [OK].
|

4
Click [OK].

5
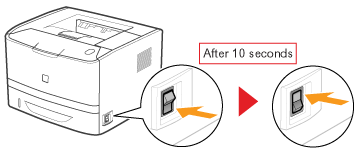
Restart the printer. (Turn OFF the printer once, wait for 10 seconds or longer, and then turn it ON.)
After restarting the printer, the Remote UI is enabled.

