Clearing Paper Jams (Inside the Front Cover)
1
If you are using the multi-purpose tray, close it.
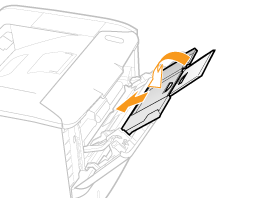
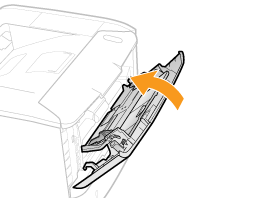
2
Open the front cover while pressing the open button.
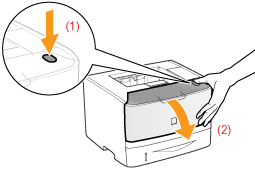
3
Remove the toner cartridge.
Immediately place the removed toner cartridge into the original protective bag or wrap it with a thick cloth.
 |
For details on handling the toner cartridge, see "Attention (Toner Cartridge)."
|
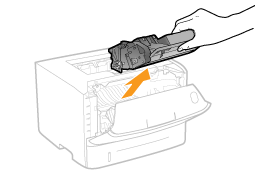
4
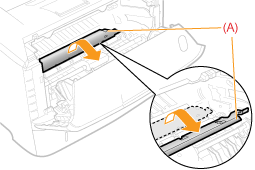
Holding the green tab (A), tilt the transport guide toward you.
Do not take your hands off the transport guide until it moves back to its original position in Sep 6.
5
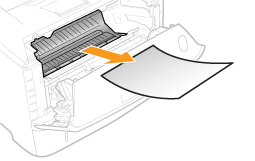
Remove the paper by pulling it gently.
Remove the jammed paper as horizontally as possible to prevent unfixed toner from spilling.
6
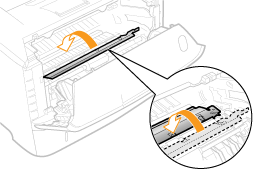
Move the transport guide back to its original position slowly.
7
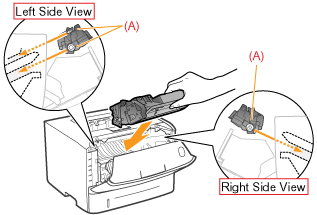
Install the toner cartridge.
Push the toner cartridge into the printer firmly until it touches the back of the printer while aligning (A) on both sides of the toner cartridge with the toner cartridge guides inside the printer.
8
Close the front cover.
|
→
|
The
 (Paper Jam) indicator turns off, and the printer is ready to print. (Paper Jam) indicator turns off, and the printer is ready to print. |
 If you cannot close the front cover If you cannot close the front coverMake sure that the toner cartridge is installed in the printer properly. Do not try to forcefully close the front cover, as this may damage the printer.
  If the If the  (Paper Jam) indicator does not turn off (Paper Jam) indicator does not turn offPaper may be jammed in another area. Check another area also and remove the paper.
|