Removing the Packing Materials
|
NOTE
|
Store the packing materials come up during unpacking.The box comes with when you purchased the printer and the packing materials in the box are required when transporting the printer for relocation or maintenance.
About the packing materialsThe packing materials may be changed in form or placement, or may be added or removed without notice.
|
Remove all the orange tape if it is attached to the printer when performing the following procedure.
1
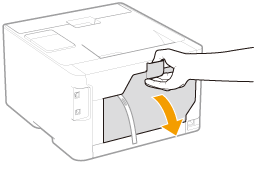
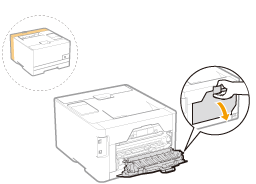
Open the rear cover.
2
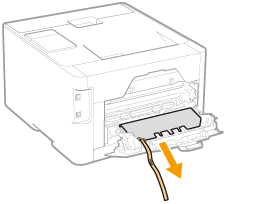
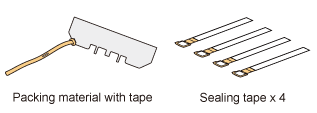
Remove the packing material with tape on the transfer roller.
3
Close the rear cover.
4
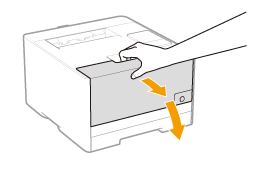
Open the front cover.
5
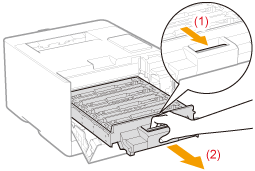
Press the lever and pull out the toner cartridge tray.
6
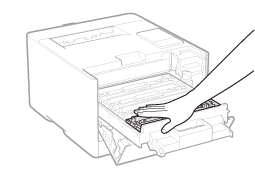
Hold down the toner cartridge as shown in the figure.
7
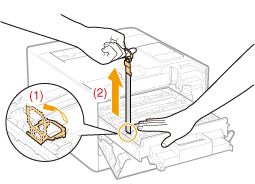
Remove the tab, and then pull out the sealing tape (approx. 20 in. (50 cm)).
|
IMPORTANT
|
Precautions when pulling out the sealing tapeDo not pull out the sealing tape in the direction other than the arrow. If the tape is severed, this may become difficult to pull out completely.
If the sealing tape stops at midpoint, pull it out of the toner cartridge completely. If any tape remains in the toner cartridge, this may result in poor print quality.
Dispose of the removed sealing tape according to local regulations.
|
8
Pull out the sealing tapes of all the toner cartridges.
Make sure that all four pieces of sealing tape have been removed.
9
Push in the toner cartridge tray.
10
Close the front cover.
 If you cannot close the front cover If you cannot close the front coverMake sure that the toner cartridge tray is closed. Do not try to forcefully close the front cover, as this may damage the printer.
|
|
Check !
|
||||||||||||
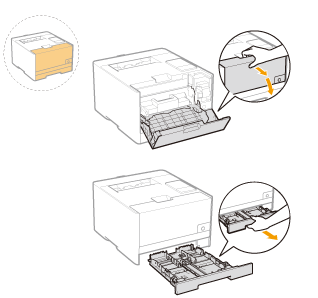
Checking if the packing materials are removedMake sure that the following packing materials are completely removed.
|
||||||||||||


 "
"