Adjusting the Color
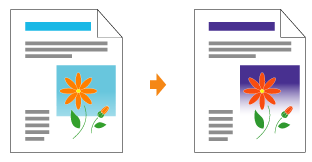
You can perform color printing with the color adjusted.

 |
This section describes the procedure for adjusting the color when printing in the printer driver.
Perform calibration when the colors have changed and the data is not printed in the correct colors (specified colors).
|
1
Display the setting screen of the printer driver.
2
Display the [Color Settings] dialog box.
|
(1)
|
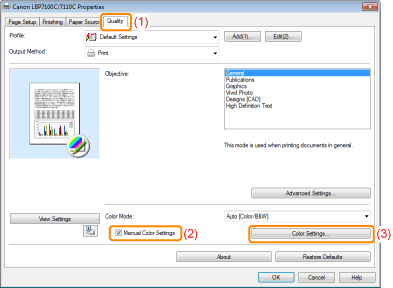
Display the [Quality] sheet.
|
|
(2)
|
Select the [Manual Color Settings] check box.
|
|
(3)
|
Click [Color Settings].
|

3
Adjust the color.
|
(1)
|
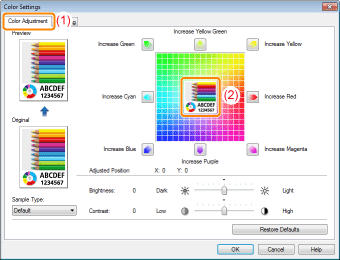
Display the [Color Adjustment] sheet.
|
||||
|
(2)
|
Adjust the colors by moving [Preview Image] at the center of the Adjustment Grid horizontally and vertically.*
|

 |
*
|
Move [Preview Image] by either of the following procedures.
|
|
Click the buttons of each color around the Adjustment Grid (the color is deepened by one increment).
|
||
|
Click any desired color on the Adjustment Grid ([Preview Image] is moved to the position you clicked).
|
||
|
Drag [Preview Image] onto the desired color.
|
|
NOTE
|
Confirm [Preview Image] position by values.You can confirm the position of [Preview Image] by the X (horizontal) and Y (vertical) values for [Adjusted Position].
(The central position is X: 0, Y: 0.)
|
4
Click [OK]. Then, the [Quality] sheet reappears.
5
Click [OK].
 |
For details on the basic printing procedure, see "Basic Printing Procedure."
|