Printing from USB Memory (USB Print)
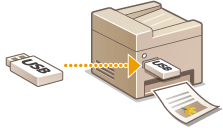
You can print image files stored in a USB memory device by connecting it directly to the machine. Using this function, you can print without using a computer.
Available File Formats
You can print the following types of image files.
JPEG (DCF/Exif 2.21 or earlier/JFIF)
TIFF (JPEG/MH/MR/MMR compression)
PDF
 |
Maximum printable data size per file* is 50 MB. * For multi-page TIFF files, maximum data size is per page. Note that even some files smaller than the size described above may not be printed correctly. |
Available USB Memory Devices
You can use USB memory devices with the following format styles.
FAT16 (memory capacity: up to 2 GB)
FAT32 (memory capacity: up to 32 GB)
 |
Do not use non-standard USB memory devices. You may not be able to print the images properly in some USB memory devices. Do not connect anything other than a USB memory device. USB memory devices cannot be connected via a USB hub or an extension cable. Do not use USB memory devices with special functions such as built-in security functions. |
 |
The USB memory port of the machine supports USB 2.0. If a folder in a USB memory device has many files, scanning image files to print will take more time. Use your computer to delete unnecessary files on your USB memory device or move them to a different folder. |
1
Connect a USB memory device to the USB memory port.
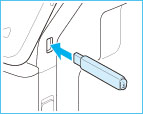

Do not remove the USB memory device or shock or shake the device or the machine when data is being read or written. Also, do not turn OFF the machine while the processing is in progress.
2
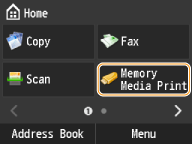
Tap <Memory Media Print>.
3
Tap <Select File and Print>.
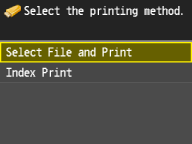

Index Print
You can print thumbnails of the image files (JPEG only) stored in a USB memory device. To print the images in thumbnails, tap <Index Print> on the screen, and proceed to the next step.
4
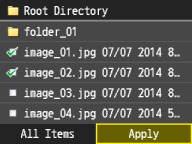
Tap the file to print.
You can select multiple files.
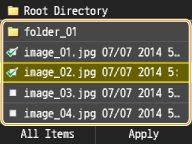
To clear a selection, select the file you have selected (marked as  ).
).
 ).
).To move to a lower folder level, tap the folder. To move to an upper folder level, press  (Back).
 (Back).
Folders and files lower than the third directory are not displayed.
When you move to another folder, the previous file selections will be cleared.
You cannot select a JPEG/TIFF document and PDF document at the same time.
 To select all files
1 | Tap <All Items>. 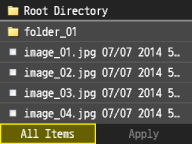 |
2 | Tap <Select All>. 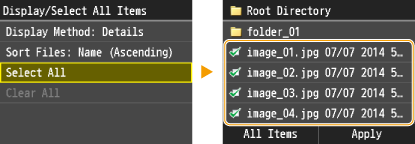 To clear all selections, tap <Clear All>. |
3 | Tap <JPEG/TIFF> or <PDF>. All JPEG/TIFF or PDF format files are selected. 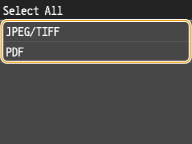  If you selected a file before you tap <All Items>, you can only select files of the same format. |
 To display previews
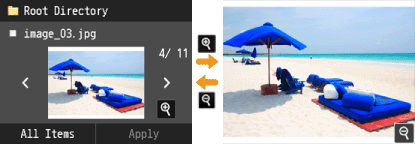
You can change the display method from <Details> (for file names and modification dates) to <Images> (for previews). By previewing images, you can check the file content before you select a file to print.

You can specify either <Details> or <Images> as the default display method. Default Display Settings
1 | Tap <All Items>. 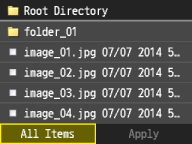 | ||||
2 | Tap <Display Method>. 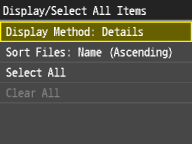 | ||||
3 | Tap the display method. 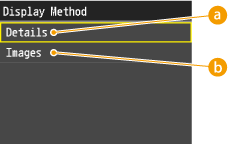  <Details> <Details>
 <Images> <Images>
|
 To change the file sort order
You can change the sort order of the files in a USB memory device.

You can specify a sort setting such as <Name (Ascending)> or <Date/Time (Ascending)> as the default setting for the file sort order. File Sort Default Settings
1 | Tap <All Items>. 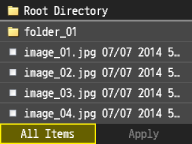 |
2 | Tap <Sort Files>. 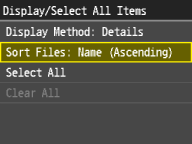 |
3 | Tap the criteria for file sorting. 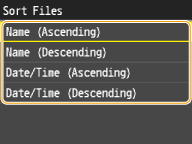 |
 When you tap <Date/Time (Ascending)> or <Date/Time (Descending)>, files are sorted based on the modification dates and time of the files. |
5
Tap <Apply>.
6
Specify the print settings as necessary.
Tap the settings, and specify each setting.
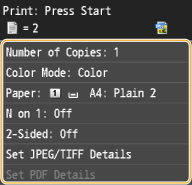
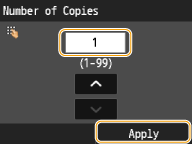
 <Number of Copies>
Specify the number of copies from 1 to 99. Use  /
/ or the numeric keys to enter a quantity, and tap <Apply>.
 /
/ or the numeric keys to enter a quantity, and tap <Apply>.
 <Color Mode>
This setting enables you to set the color mode you want to specify when printing.
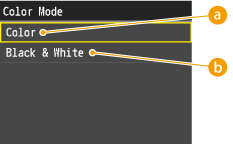
 <Color>
Data is printed in all four colors: yellow (Y), magenta (M), cyan (C), and black (K).
 <Black & White>
Data is printed in black (K) only, even if the original is in color.

If different color data is overlaid, the machine may not distinguish color from monochrome, even if <Color> is selected. For example, although the printout looks monochrome, if different color data is overlaid, it is printed in color mode, thereby using the color toner cartridges to print, not the black toner cartridge. Furthermore, if the data is created as color data in the application you are using, it is printed in color mode, even though the data looks monochrome.
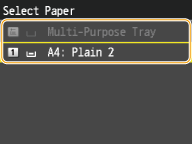
 <Paper>
Tap the paper to print on.
 <N on 1>
You can print two or four images onto a single sheet. Tap <2 on 1> or <4 on 1>.
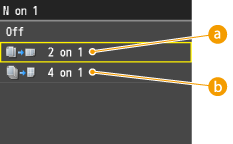
 <2 on 1>
Prints two images onto a single sheet.
 <4 on 1>
Prints four images onto a single sheet.

<N on 1> is not available for printing TIFF files.
 <2-Sided>
You can make 2-sided printouts. Tap the binding position.
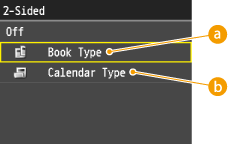
 <Book Type>
Prints images in such a way that the printed pages are opened horizontally when bound.

 <Calendar Type>
Prints images in such a way that the printed pages are opened vertically when bound.


<2-Sided> may not be available with some sizes or types of paper. Paper
 Set JPEG/TIFF Details
<Print Date>

You can print the modification date of the file below each image. Tap <On>.
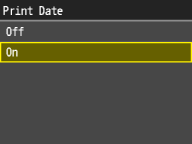

Although <Print Date> is not available for Index Print, the modification date of the file is automatically printed below each image.
<Print Date> is not available for printing PDF files.
<Print File Name>

You can print the file name below each image. Tap <On>.
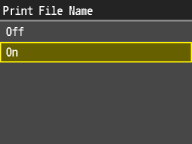

Although <Print File Name> is not available for Index Print, the file name is automatically printed below each image.
<Print File Name> is not available for printing PDF files.
<Original Type>

You can select the type of original depending on the image to print. Tap <Photo Priority> or <Text Priority>.
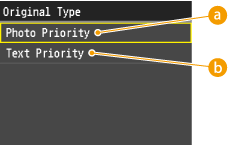
 <Photo Priority>
Gives priority to printing photo images smoothly.
 <Text Priority>
Gives priority to printing text clearly.

<Original Type> is not available for printing PDF files.
<Brightness>

You can adjust the brightness of printouts. Tap  /
/ to adjust the brightness, and tap <Apply>.
 /
/ to adjust the brightness, and tap <Apply>.
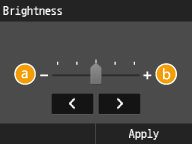
 <->
<->
Prints images darker.
 <+>
<+>
Prints images brighter.

You can adjust the brightness of TIFF files only when they are JPEG-compressed.
<Halftones>

You can select the printing method to reproduce halftones (the intermediate range between the lighter and darker areas of an image) for optimal image quality. Tap <Gradation> or <Error Diffusion>.
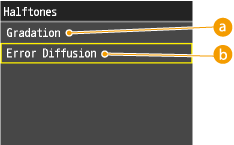
 <Gradation>
Prints images with fine gradation, such as digital camera images, with a smooth finish.
 <Error Diffusion>
Prints images with small text or fine lines with a clear finish.
 Set PDF Details
<Brightness>

You can adjust the brightness of printouts. Tap  /
/ to adjust the brightness, and tap <Apply>.
 /
/ to adjust the brightness, and tap <Apply>.
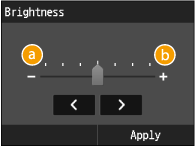
 <->
<->
Prints images darker.
 <+>
<+>
Prints images brighter.
<Enlarge/Reduce to Fit Ppr. Size>

This setting enlarges or reduces the original document to match the printable area of the paper size.
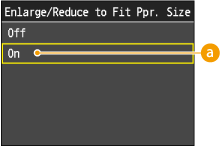
 <On>
<On>
The document is reduced to a page size that fits the paper size if the page size specified in the PDF file is larger than the printable area of the paper size. Conversely, the original document is enlarged to a page size that fills the paper size if the page size specified in the PDF file is smaller than the printable area of the paper size.

If you specify [Auto] in [Paper Size] using the Remote UI, this setting is not applied.
The PDF file page size is enlarged or reduced with the same ratio for both the length and width.
<Enlarge/Reduce to Fit Ppr. Size> is not available for printing JPEG/TIFF files.
<Enlarge Print Area>

This setting specifies whether to enlarge the printable area on the paper.
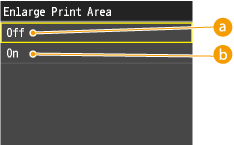
 <Off>
<Off>
The area 1/5" (4 mm) from the top, bottom, left and right edges of the paper is not printable.
 <On>
<On>
The printable area is enlarged to the top, bottom, left, and right edges of the paper.

If you select <On>, images on the edge of the paper may not print properly.
<Enlarge Print Area> is not available for printing JPEG/TIFF files.
<Print Comments>

This setting specifies whether to print annotations in the PDF file.
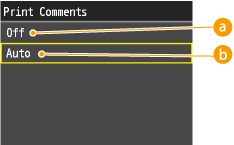
 <Off>
<Off>
No annotations are printed.
 <Auto>
Only the annotations specified for printing in the PDF file are printed.

<Print Comments> is not available for printing JPEG/TIFF files.
<Password to Open Document>

You can print password protected PDF files by entering the password required to open them.
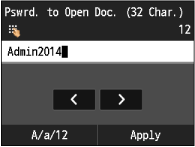

<Password to Open Document> is not available for printing JPEG/TIFF files.
<Other>
<Halftones>

You can set how to express color halftones.
Print data is expressed in dots. Fine gradations, edges, and shades are expressed by using dither patterns, which are groups of dots. This is called halftone processing.
For example, using a pattern that sharpens character and line edges, or a pattern that smoothens image and graph gradation, enables you to obtain the most suitable texture.
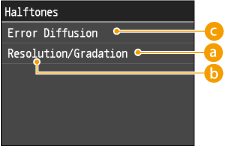
 <Gradation>
You can print with both smooth gradation and outlines, which is best to print graphs and graphics that use gradation.
 <Resolution>
You can print text with distinct outlines, which is best to print text and thin lines.
 <Error Diffusion>
If you set to <On>, <Text>, <Graphics>, and <Image> are all set to <Error Diffusion>. <Resolution> and <Gradation> cannot be selected.
<Pure Black Text>

This setting affects the printout for black (R=G=B=0% or C=M=Y=100%/Bk=N% or C=M=Y=0%/Bk=100%) text on a page. Under most circumstances it is preferable to leave this option set to <On>.
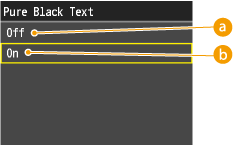
 <Off>
<Off>
The black text is printed using CMYK toners based on the selected Output Profile setting. For some jobs, it is preferable to turn this option <Off>.
 <On>
<On>
Black colors generated by applications are printed using only 100% black toner. This means that the color toner will not be misaligned since only one toner color (black) is used.

<Pure Black Text> is not available for printing JPEG/TIFF files.
<Black Overprint>

This setting allows you to choose a specific way to print black text when printing black text over a color background or graphics.
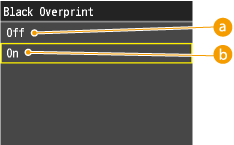
 <Off>
<Off>
Black text is printed with knockouts. The machine first prints the color background with the black text areas "knocked out" (no color is printed in the text areas). The black text is then printed in the knocked out area, filling in the areas not printed in color. This may result in the black text appearing lighter, or cause a halo effect that can appear around the edge of the text.
 <On>
<On>
If the document contains black text on a color background, "knocking out" (no color printed in the text areas) is not performed, which reduces the halo effect, a white border around the edge of the text.

<Black Overprint> is not available for printing JPEG/TIFF files.
<RGB Source Profile>

This setting allows you to specify the RGB profile that is appropriate for the characteristics of your monitor.
Settings can be applied separately for text, graphics, and image data.
Settings can be applied separately for text, graphics, and image data.
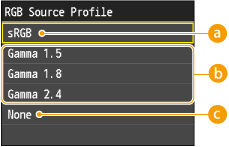
 <sRGB>
This setting specifies the industry standard definition for generic Windows computer monitors. If you are using an sRGB compatible monitor, you can print out colors close to how they appear on your monitor.
 <Gamma 1.5>, <Gamma 1.8>, and<Gamma 2.4>
Black colors generated by applications are printed using only 100% black toner. This means that the color toner will not be misaligned since only one toner color (black) is used.
 <None>
When this setting is selected, device dependent RGB data is converted into CMYK without applying the RGB profile.

If the machine receives data with a device independent (CIE based) color space definition, it is color processed with the specified settings. Therefore, <RGB Source Profile> is not applied by the machine.

You can also download the profile from iW Management Console.
Device independent colors are not dependent on any particular device, such as a monitor, and are meant to be true representations of colors as perceived by the human eye. These color representations, called device independent color spaces, result from work carried out by the Commission Internationale d'Eclairage (CIE) and for that reason are also called CIE based color spaces.
If a profile with the name of "None" is downloaded to the machine, the profile is not applied and the <None> setting on the menu is applied.
<RGB Source Profile> is not available for printing JPEG/TIFF files.
<CMYK Simulation Profile>

This setting allows you to specify the simulation target to print the CMYK (Cyan Magenta Yellow blacK) data.
The machine converts CMYK data into a device dependent CMYK color model based on the simulation target selected in the CMYK Simulation Profile.
The machine converts CMYK data into a device dependent CMYK color model based on the simulation target selected in the CMYK Simulation Profile.
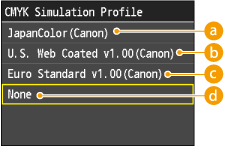
 <JapanColor(Canon)>
This setting uses the JapanColor profile. This is for obtaining a printout closely matching the printing standard in Japan.
 <U.S. Web Coated v1.00(Canon)>
This setting uses the U.S. Web Coated profile. This is for obtaining a printout closely matching the printing standard in the USA.
 <Euro Standard v1.00(Canon)>
This setting uses the Euro Standard profile. This is for obtaining a printout closely matching the printing standard in Europe.
 <None>
When this setting is selected, device dependent CMYK data is printed as is without applying the CMYK profile.

You may not be able to use all the profiles that are available. If color data is printed in gray using a downloaded profile, check the downloaded profile for compatibility.
If the machine receives data with a device independent (CIE based) color space definition, it is color processed with the specified settings. Therefore <CMYK Simulation Profile> is not applied by the machine.
When a setting other than <None> is selected, and the machine receives a device dependent color space definition that is color processed by the host computer, <CMYK Simulation Profile> is also applied by the machine.

You can also download the profile from iW Management Console.
When <None> is selected, areas of dark color may be blotchy depending on the data.
If a profile with the name of "None" is downloaded to the machine, the profile is not applied and the <None> setting on the menu is applied.
<CMYK Simulation Profile> is not available for printing JPEG/TIFF files.
<Use Grayscale Profile>

This setting allows you to define how device dependent gray data is processed.
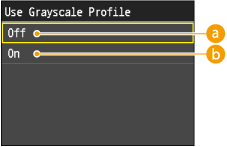
 <Off>
<Off>
Device dependent gray data is reproduced using black (K) toner only.
 <On>
<On>
Device dependent gray data is converted into CMYK data using the "Grayscale Profile" of the machine. The data may be reproduced using only the black (K) toner, depending upon the <Pure Black Text> process or <Output Profile>.

<Use Grayscale Profile> is not available for printing JPEG/TIFF files.
<Output Profile>

This setting allows you to define the profile that is appropriate for the data you are going to print. It is applied to all data in the print job, so make sure the selected profile is right for your job.
Settings can be applied separately for text, graphics, and image data.
Settings can be applied separately for text, graphics, and image data.
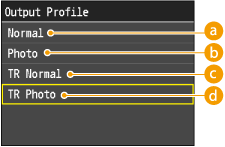
 <Normal>
This setting prints the colors closely matching the ones displayed on your monitor.
 <Photo>
This setting prints colors close to photographic prints.
 <TR Normal>
This setting prints the colors closely matching the ones displayed on your monitor, and also reduces toner bleeding of text and fine lines.
 <TR Photo>
This setting prints colors close to photographic prints, and also reduces toner bleeding of text and fine lines.

You can also download the profile from iW Management Console.
If a profile with the name of "None" is downloaded to the machine, the profile is not applied and the <None> setting on the menu is applied.
If <None> is selected for the <RGB Source Profile> or <CMYK Simulation Profile>, or if <Off> is selected for <Use Grayscale Profile>, an Output Profile setting is not applied to device dependent color data.
<Output Profile> is not available for printing JPEG/TIFF files.
<Matching Method>

This setting allows you to specify a method of printing when the <RGB Source Profile> is applied. This machine includes a color management system that provides the following color rendering styles.
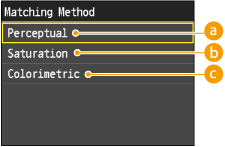
 <Perceptual>
This setting produces the best results for photographic or bitmapped images.
 <Saturation>
This setting is best suited for printing illustrations and diagrams used in business presentations.
 <Colorimetric>
This setting provides a close match to the RGB color value of the machine's printing range.

Selecting <Normal> or <TR Normal> in the <Output Profile> and <Perceptual> in the <Matching Method> is equivalent to setting [Matching Method] to [Perceptual [Monitor Color Matched]] in the printer driver.
Selecting <Photo> or <TR Photo> in the <Output Profile> and <Perceptual> in the <Matching Method> is equivalent to setting [Matching Method] to [Perceptual [Photographic]] in the printer driver.
Selecting <Photo> or <TR Normal> in the <Output Profile> and <Saturation> in the <Matching Method> is equivalent to setting [Matching Method] to [Vivid Photo] in the printer driver.
If <None> is selected for the <RGB Source Profile> or <CMYK Simulation Profile>, and the machine receives a device dependent color space definition that is color processed by the host computer, a Matching Method setting is not applied.
<Matching Method> is not available for printing JPEG/TIFF files.
<RGB Pure Black Process>

This setting enables you to specify how black and gray data with the equivalent ratio of R to G to B should be processed when device dependent RGB data is converted into device dependent CMYK data using the <RGB Source Profile> of the machine.
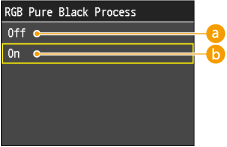
 <Off>
<Off>
Black and gray data with the equivalent ratio of R to G to B is printed using CMYK toners based on the selected <Output Profile> setting.
 <On>
<On>
Black and gray data with the equivalent ratio of R to G to B is printed using the black (K) toner only, regardless of the selected <Output Profile> setting.

If you can see gradations or jagged lines in the printouts of black or gray data, select <Off> in RGB Pure Black Process and select <Photo> for <Output Profile>.

In combination with certain settings, black and gray data with the equivalent ratio of R to G to B may be printed using the black (K) toner only, even if <Off> is selected. The following are examples.
When <On> is selected for <Pure Black Text> When <None> is selected for <RGB Source Profile> When <TR Normal> or <TR Photo> is selected for <Output Profile> When [Use 100% GCR Profile] in the printer driver is selected |
If <None> is selected for <RGB Source Profile>, the RGB Pure Black Process setting is not applied.
<RGB Pure Black Process> is not available for printing JPEG/TIFF files.
<CMYK Pure Black Process>

This setting enables you to specify how monochrome data (C=M=Y=0) should be printed when the device dependent CMYK data is processed using the <CMYK Simulation Profile> of the machine.
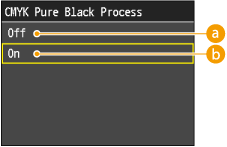
 <Off>
<Off>
Monochrome data (C=M=Y=0) is printed using CMYK toners based on the selected <Output Profile> setting.
 <On>
<On>
Monochrome data (C=M=Y=0) is printed using the black (K) toner only, regardless of the selected <Output Profile> setting.

In combination with certain settings, monochrome data (C=M=Y=0) may be printed using the black (K) toner only, even if <Off> is selected. The following are examples.
When <On> is selected for <Pure Black Text> When <None> is selected for <CMYK Simulation Profile> When <TR Normal> or <TR Photo> is selected for <Output Profile> When [Use 100% GCR Profile] in the printer driver is selected |
If <None> is selected for <CMYK Simulation Profile>, the CMYK Pure Black Process setting is not applied.
<CMYK Pure Black Process> is not available for printing JPEG/TIFF files.
<Composite Overprint>

You can overprint device-dependent CMYK data as composite output.
All colors used for data are overlaid and printed on one plate so you can check the finished result without separating the colors.
All colors used for data are overlaid and printed on one plate so you can check the finished result without separating the colors.
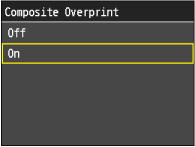

This setting is only available for data having the overprint attribute set.
This setting does not apply overprinting to spot colors.
If a setting other than <None> is selected for <CMYK Simulation Profile> overprinting is not applied.
<Composite Overprint> is not available for printing JPEG/TIFF files.
<Advanced Smoothing>

This setting smoothes jagged outlines of graphics (illustrations created by application software) and characters.
<Smooth 2> performs a higher level of smoothing than <Smooth 1>. If <Smooth 1> is selected and the results are still not printed smoothly, select <Smooth 2>.
By switching the on/off for <Apply to Graphics> and <Apply to Text>, you can select whether to apply smoothing to graphics or text data.
<Smooth 2> performs a higher level of smoothing than <Smooth 1>. If <Smooth 1> is selected and the results are still not printed smoothly, select <Smooth 2>.
By switching the on/off for <Apply to Graphics> and <Apply to Text>, you can select whether to apply smoothing to graphics or text data.
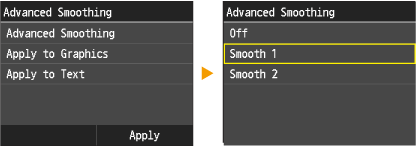

This setting allows you to apply smoothing to graphics data and text data. Smoothing is not applied to image data.

<Apply to Graphics> and <Apply to Text> can only be selected when <Smooth 1> or <Smooth 2> is selected for Advanced Smoothing.
Settings for <Apply to Graphics> and <Apply to Text> on the display will be effective only if [Printer Default] is set for Advanced Smoothing in the printer driver.
The results of Advanced Smoothing may differ depending on the characters and graphics patterns.
<Advanced Smoothing> is not available for printing JPEG/TIFF files.
<Grayscale Conversion>

You can select ways to convert color values to a grayscale value when you print color print data.
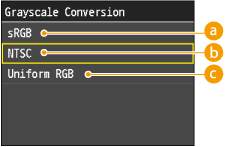
 <sRGB>
Lets you to calculate the grayscale value by the color conversion method based on sRGB.
 <NTSC>
Lets you to calculate the grayscale value by the color conversion method based on NTSC.
 <Uniform RGB>
Counts the average value of the Red, Green, and Blue values as the grayscale value.

This section describes the settings to convert the color data into grayscale data.
This setting is invalid for black-and-white data.
If <Color Mode> is set to <Color>, this setting is invalid.
<Grayscale Conversion> is not available for printing JPEG/TIFF files.
<Print Quality>
<Density> (<Density (Fine Adjust)>)

This mode is not available if you set <Toner Save> to <On>.
This setting adjusts the print density.
This setting adjusts the print density.
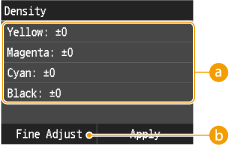
 <Yellow><Magenta><Cyan><Black>
Adjusting each of the <Yellow>, <Magenta>, <Cyan>, and <Black> print densities.
 <Fine Adjust>
Making fine adjustments to each of the <Yellow>, <Magenta>, <Cyan>, and <Black> print densities.

<Density> (<Density (Fine Adjust)>) is not available for printing JPEG/TIFF files.
<Toner Save>

This setting enables you to set the Toner Save mode. Toner Save uses less toner to print documents and may result in longer toner life.
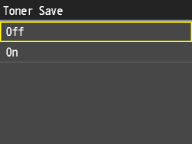

<Toner Save> is not available for printing JPEG/TIFF files.
<Special Smoothing Mode>

This setting specifies the mode for special smoothing processing. Special smoothing processing corrects vertical color misalignment, which enables you to smoothly print characters, lines, diagrams, images (photos), and gradations that have dark colors.
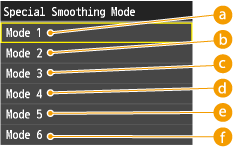
 <Mode 1>
Smoothly prints the edges of characters, lines, and diagrams that have dark colors. Select <Mode 1> to perform printing normally.
 <Mode 2>
Smoothly prints not only the edges of diagrams, but also the halftones inside the diagrams. Set <Mode 2> if large characters and halftones inside fat lines that have dark colors are misaligned and not printed smoothly when printing with <Mode 1> set.
 <Mode 3>
Smoothly prints characters and lines that have dark colors on a halftone background. Set <Mode 3> if large characters and halftones inside fat lines that have dark colors are misaligned, or when the edges of characters and lines that have light colors are uneven, and not printed smoothly when printing with <Mode 1> set.
 <Mode 4>
Smoothly prints the edges of various objects. Set <Mode 4> if the edges of large characters and fat lines that have light colors are uneven and not printed smoothly when printing with <Mode 1> set.
 <Mode 5>
Evenly prints images and halftone objects. Set <Mode 5> if the gradation bands of images and diagrams are uneven or the dithering patterns are uneven when printing with <Mode 1> set.
 <Mode 6>
Evenly prints all objects. Set <Mode 6> if the halftones of the entire image are misaligned and uneven when printing with <Mode 1> set.

<Special Smoothing Mode> is not available for printing JPEG/TIFF files.
<Toner Volume Correction>

This setting enables you to set the Toner Save function. Toner Save uses less toner to print documents and may result in longer toner life.
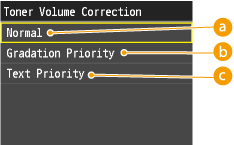
 <Normal>
Text and line data are printed with a toner volume that upholds the resolution for text and lines. Other types of data are printed with a toner volume that upholds the color.
 <Gradation Priority>
All data is printed with a toner volume that upholds the color.
 <Text Priority>
All data is printed with a toner volume that upholds the resolution.

The internal restriction value cannot be changed.
If <Gradation Priority> is selected, characters and lines may bleed.
If <Text Priority> is selected, the color may not match.
<Toner Volume Correction> is not available for printing JPEG/TIFF files.
<Line Control>

This setting enables you to specify the image processing for lines. Under most circumstances, it is preferable to leave this setting as <Resolution Priority>.
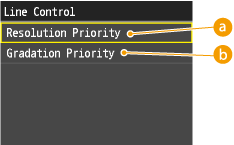
 <Resolution Priority>
Image processing is performed that upholds the same resolution as text for lines.
 <Gradation Priority>
Image processing is performed that upholds the same color and gradation as graphics for lines.

<Line Control> is not available for printing JPEG/TIFF files.
7
Press  .
.
 .
.Printing starts.
If you want to cancel printing, tap <Cancel>  <Yes>.
 <Yes>.
8
Disconnect the USB memory device from the USB memory port.
1 | Press  . . |
2 | Press  . . |
3 | Tap <Device Status>. |
4 | Tap <Remove Memory Media>. Wait until the message <The memory media can be safely removed.> is displayed. |
5 | Disconnect the USB memory device. |
 |
If you always want to print with the same settings: Changing Default USB Print Settings |
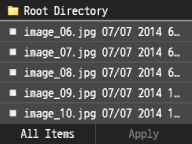
 to display a larger preview. Tap
 to return to the original preview size.