Printing Results Are Not Satisfactory
Grime inside the machine may affect printing results. First try cleaning the machine. Cleaning the Machine
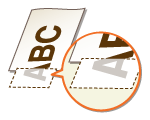
Smudge Marks Appear on the Bottom Edge of Printouts

 Did you print data without margins, all the way to the edge of the page?
This symptom occurs if a margin is set to none in the printer driver. The range that can be printed on this machine is the range inside a 5 mm margin around the edge of the paper or a 10 mm margin around the edge of envelopes. Make sure to have margins around the document to print.
[Finishing] tab  [Advanced Settings]
  [Expand Print Region and Print]
  [Off]
[Off]
 [Advanced Settings]
  [Expand Print Region and Print]
  [Off]
[Off]Streaks Appear on Printouts

 Are you using appropriate paper?
In the printer driver, set [Output Adjustment Mode] to [On].
[Quality] tab  [Advanced Settings]
  [Output Adjustment Mode]
  [On]
[On]
 [Advanced Settings]
  [Output Adjustment Mode]
  [On]
[On]
Printing speed may be slower if you set the mode to [On].
In the printer driver, change the setting of [Special Print Adjustment A]. The improvement effect is weakest for [Mode 1] and strongest for [Mode 4]. Try the adjustment starting with [Mode 1].
[Finishing] tab  [Advanced Settings]
  [Special Print Adjustment A]
  Select mode
 [Advanced Settings]
  [Special Print Adjustment A]
  Select mode
When you select a stronger improvement effect, the overall print density becomes lighter. Also, edges may become less sharp and details may be rougher.
In the Printer Status Window, enable [Reduce Toner Spots Around Text].
Displaying the Printer Status Window
Displaying the Printer Status Window
[Options]  [Device Settings]
  [Assisting Print Settings]
  Select the [Reduce Toner Spots Around Text] check box
 [Device Settings]
  [Assisting Print Settings]
  Select the [Reduce Toner Spots Around Text] check box
When you select this check box, print quality may be lower for some types of paper (especially thin paper) and some printing environments (especially environments with high humidity). In that case, clear the check box.
Turn over the paper (front to back) so that the print side is changed, and then reload the paper.

Rarely, the symptoms may worsen depending on the type of paper you are using. In that case, get the print side back to original.
 Toner may adhere when you replace the toner cartridge or when you leave the machine without printing for a long period.
In the printer driver, change the setting of [Special Print Adjustment B]. The remedial effect is weakest for [Mode 1] and strongest for [Mode 3]. Try the adjustment starting with [Mode 1].
[Finishing] tab  [Advanced Settings]
  [Special Print Adjustment B]
  Select mode
 [Advanced Settings]
  [Special Print Adjustment B]
  Select mode
When you select a stronger improvement effect, printing speed becomes slower.
Toner Smudges and Splatters Appear

 Are you using appropriate paper?
In the Printer Status Window, enable [Reduce Toner Spots Around Text].
Displaying the Printer Status Window
Displaying the Printer Status Window
[Options]  [Device Settings]
  [Assisting Print Settings]
  Select the [Reduce Toner Spots Around Text] check box
 [Device Settings]
  [Assisting Print Settings]
  Select the [Reduce Toner Spots Around Text] check box
When you select this check box, print quality may be lower for some types of paper (especially thin paper) and some printing environments (especially environments with high humidity). In that case, clear the check box.
Afterimages Appear in Blank Areas

 Are you using appropriate paper?
Check the usable paper types, and replace with appropriate paper.
Paper
Paper
 Is it time to replace the toner cartridge?
Materials inside the toner cartridge may have deteriorated. Replace the toner cartridge.
How to Replace Toner Cartridges
How to Replace Toner Cartridges
Printouts Are Faded

 Is toner running low?
Remove the toner cartridge, shake it 5 or 6 times to evenly distribute the toner inside the cartridge, and then reload it into the machine.
Using Up All of the Toner
Using Up All of the Toner
 Are you using appropriate paper?
Check the usable paper types, and replace with appropriate paper.
Paper
Paper
 Have you specified the correct paper type?
Specify the type of paper again, according to the type of paper that you are using.
Basic Print Operations
Basic Print Operations
A Portion of the Page Is Not Printed/Printing Position is Wrong

 Did you print data without margins, all the way to the edge of the page?
This symptom occurs if a margin is set to none in the printer driver. The range that can be printed on this machine is the range inside a 5 mm margin around the edge of the paper or a 10 mm margin around the edge of envelopes. Make sure to have margins around the document to print.
[Finishing] tab  [Advanced Settings]
  [Expand Print Region and Print]
  [Off]
[Off]
 [Advanced Settings]
  [Expand Print Region and Print]
  [Off]
[Off]White Streaks Appear/Printing is Uneven

 Is toner running low?
Remove the toner cartridge, shake it 5 or 6 times to evenly distribute the toner inside the cartridge, and then reload it into the machine.
Using Up All of the Toner
Using Up All of the Toner
 Is it time to replace the toner cartridge?
Materials inside the toner cartridge may have deteriorated. Replace the toner cartridge.
How to Replace Toner Cartridges
How to Replace Toner Cartridges
White Spots Appear

 Are you using paper that has absorbed moisture?
Replace with appropriate paper.
Paper
Paper
 Are you using appropriate paper?
Check the usable paper types, and replace with appropriate paper.
Paper
Paper
 Is it time to replace the toner cartridge?
Materials inside the toner cartridge may have deteriorated. Replace the toner cartridge.
How to Replace Toner Cartridges
How to Replace Toner Cartridges
 Are you printing a document with strong contrasts between light and dark, and does the white appear around text or edges in an image?
In the printer driver, set [Special Print Mode] to [Special Settings 2].
[Finishing] tab  [Advanced Settings]
  [Special Print Mode]
  [Special Settings 2]
 [Advanced Settings]
  [Special Print Mode]
  [Special Settings 2]
Compared to the [Off] setting, the [Special Settings 2] setting selects lighter print density.
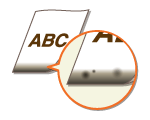
Black Spots Appear
Reverse Side of Paper is Smudged

 Have you loaded paper that is smaller than the size of the print data?
Check to make sure that the paper size matches the size of the print data.
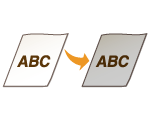
Printouts Are Grayish

 Is the machine installed in a location where it is exposed to direct sunlight?
Move the machine to a location where it is not exposed to direct sunlight.
Relocating the Machine
Relocating the Machine
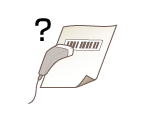
Printed Barcode Cannot Be Read

 Are you trying to read a small barcode or one with thick lines?
Enlarge the barcode.
In the printer driver, set [Special Print Mode] to [Special Settings 1].
[Finishing] tab  [Advanced Settings]
  [Special Print Mode]
  [Special Settings 1]
 [Advanced Settings]
  [Special Print Mode]
  [Special Settings 1]
When you specify [Special Settings 1], printouts may be faded.
