Configuring the Protocol Settings
This section describes the procedure for specifying the settings using the Remote UI.
 |
In the Remote UI, you can specify the settings by accessing the printer from a Web browser via a network.
|
|
IMPORTANT
|
Before configuring the protocol settingsWhen configuring the protocol settings for the printer using the above software, the TCP/IP protocol must be able to be used in your network environment.
Make sure that each setting option for TCP/IP is specified, the printer and computer are connected properly, and the printer is ON.
|
|
NOTE
|
||
When specifying the settings using software other than the Remote UIYou can also specify the settings using the following software.
You can specify the settings by accessing the FTP server of the printer using Command Prompt.
|
1
Start the Remote UI, and then log in as Administrator.
2
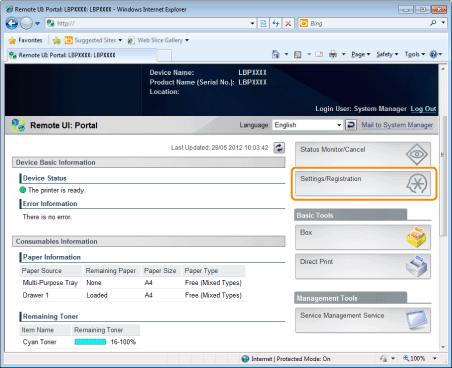
Click [Settings/Registration].
3
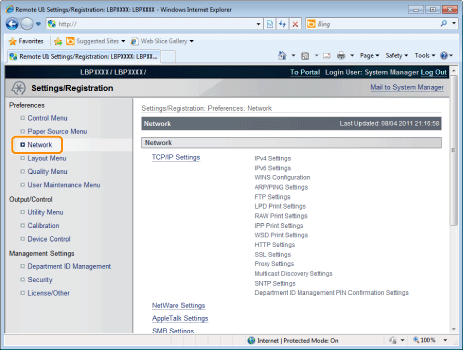
Select [Network] from the [Preferences] menu.
4
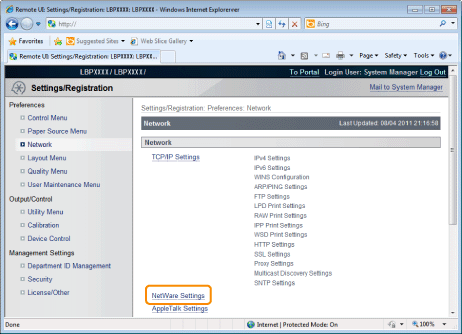
Click [NetWare Settings].
5
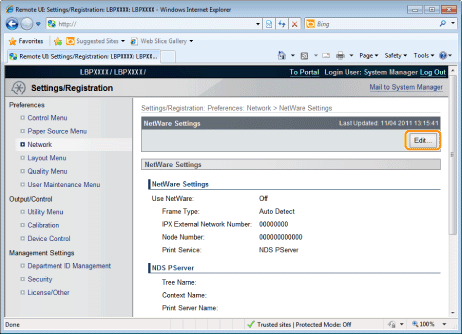
Click [Edit...].
6
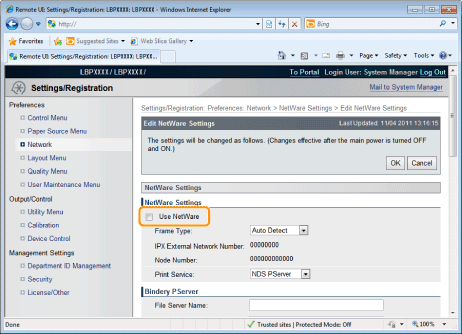
Select the [Use NetWare] check box.
|
NOTE
|
When the [Use NetWare] check box is clearedThe printer is not detected on the NetWare network.
|
7
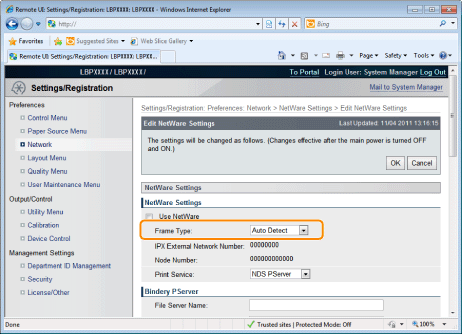
Set [Frame Type].
Select the frame type that is used by the system environment you are using from [Auto Detect], [Ethernet II], [Ethernet 802.2], [Ethernet 802.3] or [Ethernet SNAP].
When using Bindery PServer: Queue Server Mode (the print server of Bindery Mode)
|
1.
|
Select [Bindery PServer] from [Print Service].
|
|
2.
|
In [File Server Name], enter the file server name created in "Configuring NetWare."
|
|
3.
|
In [Print Server Name], enter the print server name created in "Configuring NetWare."
|
|
4.
|
In [Print Server Password], enter the password for the print server.
|
|
5.
|
In [Printer Number], enter the same printer number as the one specified in "Configuring NetWare."
|
|
6.
|
Specify the settings for [Service Mode], [Printer Form], [Polling Interval], and [Buffer Size] as needed.
|
When using NDS PServer: Queue Server Mode (the print server of NDS)
|
1.
|
Select [NDS PServer] from [Print Service].
|
|
2.
|
In [Tree Name] and [Context Name], enter the name of the tree to which the print server belongs and the context name.
|
|
3.
|
In [Print Server Name], enter the print server name created in "Configuring NetWare."
|
|
4.
|
In [Print Server Password], enter the password for the print server.
|
|
5.
|
In [Printer Number], enter the same printer number as the one specified in "Configuring NetWare."
|
|
6.
|
Specify the settings for [Service Mode], [Printer Form], [Polling Interval], and [Buffer Size] as needed.
|
When using RPrinter: Remote Printer Mode (the print server of Bindery Mode)
|
1.
|
Select [RPrinter] from [Print Service].
|
|
2.
|
In [File Server Name], enter the file server name created in "Configuring NetWare."
|
|
3.
|
In [Print Server Name], enter the print server name created in "Configuring NetWare."
|
|
4.
|
In [Printer Number], enter the same printer number as the one specified in "Configuring NetWare."
|
When using NPrinter: Remote Printer Mode (the print server of NDS)
|
1.
|
Select [NPrinter] from [Print Service].
|
|
2.
|
In [Tree Name] and [Context Name], enter the name of the tree to which the print server belongs and the context name.
|
|
3.
|
In [Print Server Name], enter the print server name created in "Configuring NetWare."
|
|
4.
|
In [Printer Number], enter the same printer number as the one specified in "Configuring NetWare."
|
8
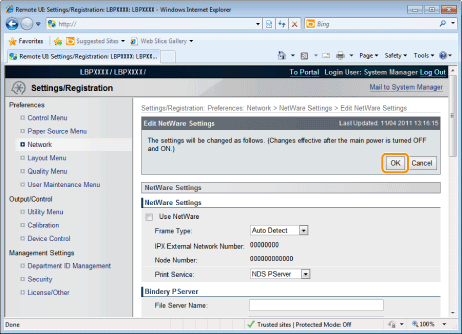
Click [OK].
9
Perform a hard reset or restart the printer.
|
→
|
After performing a hard reset or restarting the printer, the settings are effective.
|
|
NOTE
|
||||||
To perform a hard resetYou can perform a hard reset using the following procedure.
|