Enabling SSL Encrypted Communication for the Remote UI
You can encrypt communication between the machine and a Web browser on the computer by using Secure Sockets Layer (SSL). SSL is a mechanism for encrypting data sent or received over the network. SSL must be enabled when the Remote UI is used for specifying settings for IPSec (Pre-Shared Key Method), IEEE 802.1X authentication (TTLS/PEAP), or SNMPv3. To use SSL for the Remote UI, you need to set a key pair and enable the SSL function. Generate or install the key pair for SSL before enabling SSL (Configuring Settings for Key Pairs and Digital Certificates).

1
Start the Remote UI and log on in System Manager Mode. Starting Remote UI
2
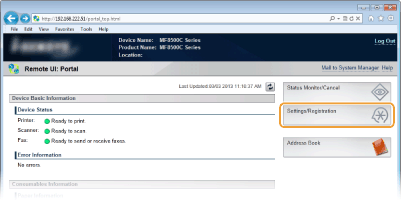
Click [Settings/Registration].
3
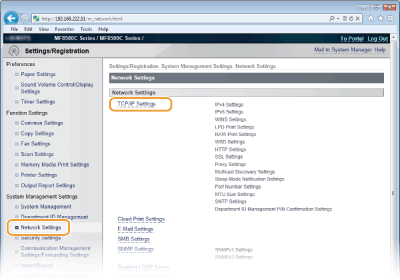
Click [Network Settings]  [TCP/IP Settings].
 [TCP/IP Settings].
4
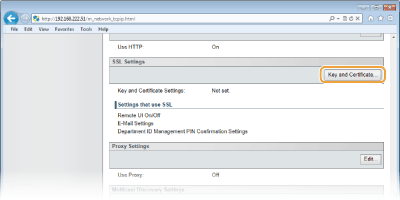
Click [Key and Certificate...] in [SSL Settings].
5
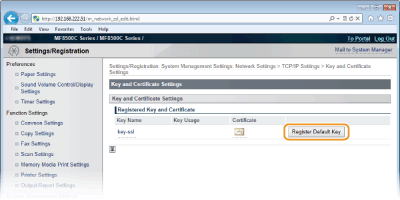
Click [Register Default Key] on the right of the key pair you want to use.
NOTE:
Viewing details of a certificate
You can check the details of the certificate or verify the certificate by clicking the corresponding text link under [Key Name], or the certificate icon. Verifying Key Pairs and Digital Certificates
Viewing details of a certificate
You can check the details of the certificate or verify the certificate by clicking the corresponding text link under [Key Name], or the certificate icon. Verifying Key Pairs and Digital Certificates
6
Enable SSL for the Remote UI.
|
1
|
Click [Security Settings]
 [Remote UI Settings]. [Remote UI Settings].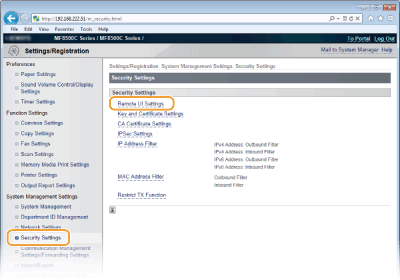 |
|
2
|
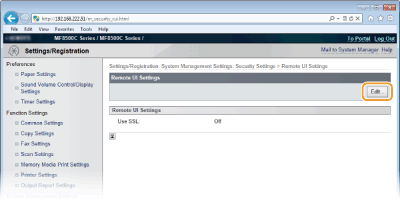
Click [Edit...].
 |
|
3
|
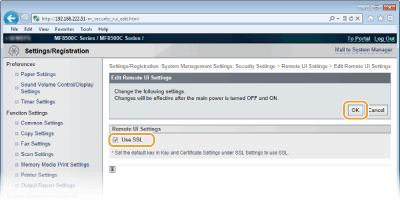
Select the [Use SSL] check box and click [OK].
 |
7
Restart the machine.
Turn OFF the machine, wait for at least 10 seconds, and turn it back ON.
|
NOTE
|
Using the operation panelYou can enable or disable the SSL encrypted communication from
 . Use SSL . Use SSL Starting the Remote UI with SSLIf you try to start the Remote UI when SSL is enabled, a security alert may be displayed regarding the security certificate. In this case, check that the correct URL is entered in the address field, and then proceed to display the Remote UI screen. Starting Remote UI
Enabling SSL for e-mailing (MF8580Cdw only)If the SMTP server and the POP3 server support SSL, you can enable SSL for communication with these servers (Configuring Advanced E-mail Settings). For more information about the SMTP server and the POP3 server, contact your Internet service provider or Network Administrator.
|