Sending an E-mail to Multiple Destinations
If you register a group that includes multiple e-mail addresses in the address book, you can send to all of the e-mail addresses included in that group at once by selecting that group as the destination.
Benefits of Sending to a Group
You can send an e-mail to multiple destinations at once.
|
Required Condition
|
|
(If you are using the imageRUNNER ADVANCE C3320) The Send function is available for use.
Network settings are set.
E-mail settings are specified.
|
This section describes how to store three previously registered e-mail addresses as "Group A," and send a two page e-mail to that group.
The screens may differ, depending on the model of the machine and on attached optional products.
Follow the procedures below.
Registering a New Group
Sending an E-Mail
Registering a New Group
You can perform this procedure using the touch panel display or the Remote UI. Using the Remote UI, you can perform this operation with ease.
Using the Remote UI
1.
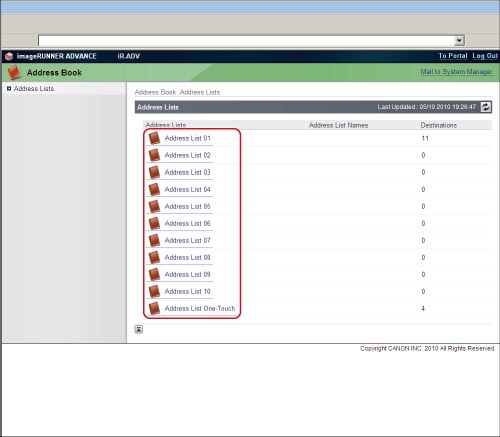
Access the Remote UI → click [Address Book] → select an address list from the Address Lists page.
2.
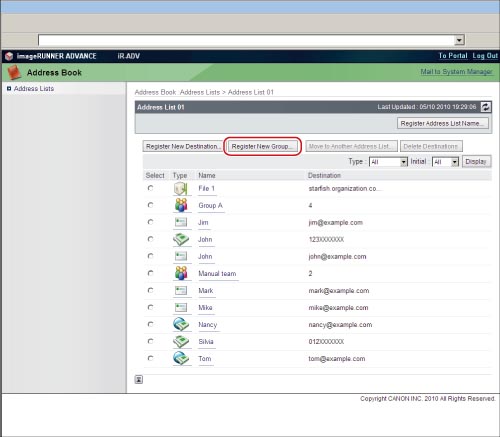
Click [Register New Group].
3.
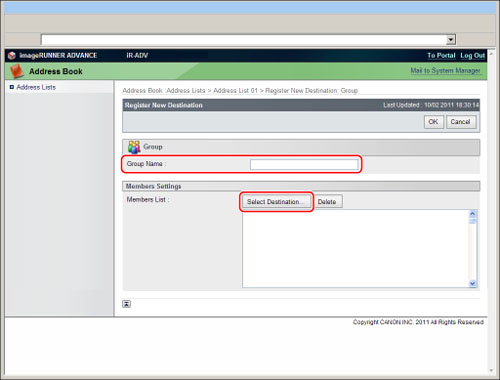
Enter 'Group A' in <Group Name> → click [Select Destination...] for <Member List>.
4.
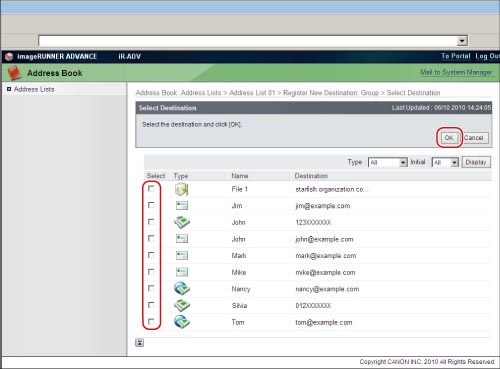
Select the e-mail addresses that you want to store in the group → click [OK].
Using the Touch Panel Display
1.
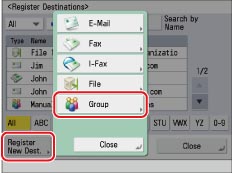
Press  (Settings/Registration) → [Set Destination] → [Register Destinations] → [Register New Dest.] → [Group].
 (Settings/Registration) → [Set Destination] → [Register Destinations] → [Register New Dest.] → [Group].
2.
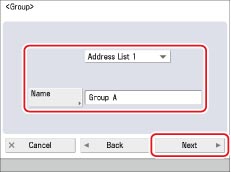
Press [Name] → enter 'Group A' as the new group name → press [Next].
3.
Press [Add from Address Book] → select the e-mail addresses that you want to store in the group → press [OK].
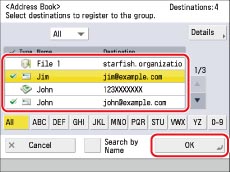
Repeat this step two times, and select total of three e-mail addresses.
A new group destination is registered.
Sending an E-Mail
1.
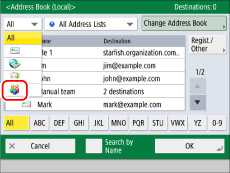
Press [Scan and Send] on the Main Menu screen → [Address Book] → select [ ] from the drop-down list.
 ] from the drop-down list.
|
NOTE
|
|
If the Main Menu screen is not displayed, press [Main Menu].
|
2.
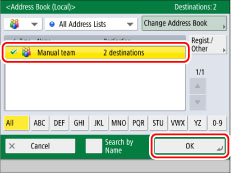
Select the newly registered destination [Group A] → press [OK].
3.
Place the original in the feeder or on the platen glass → press  (Start).
 (Start).
 The e-mail is sent.
4.
Press [Status Monitor/Cancel] → [Send] → [Log] → check that the e-mail was sent successfully.
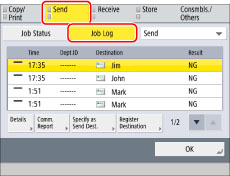
If the result is [OK], the e-mail was sent successfully.
If the result is [NG], the e-mail was not sent because of an error.