Registering an I-Fax Address
You can store the I-fax address, the mode, and the destination conditions.
1.
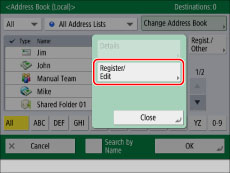
Press [Scan and Send] → [Address Book].

2.
Press [Regist./Other].

3.
Press [Register/Edit].
4.
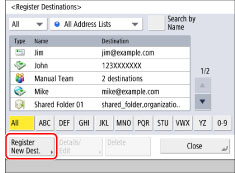
Press [Register New Dest.].
5.
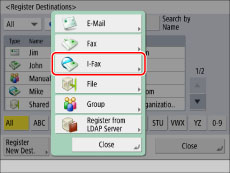
Press [I-Fax].
6.
Select an address list from Address List 1 to 10.
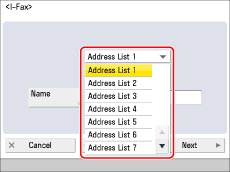
Address lists are a convenient way to classify destinations.
7.
Press [Name].
8.
Enter a name for the destination → press [OK].
The registered name is used as the display name of the e-mail address.
|
NOTE
|
|
The first character that you enter for the name is used for sorting the destination list when you press keys, such as [ABC], [DEF], and [GHI], on the Address Book screen. If [Search by Name] is pressed on the Address Book screen, a screen for narrowing the search in the Address Book appears.
|
9.
Press [Next].
10.
Select the desired mode from the <Mode:> drop-down list.
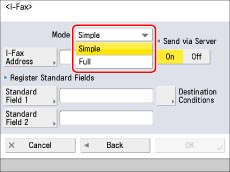
For details on the settings, see step 3 of "Specifying Destinations by Entering an I-Fax Address."
11.
Press [I-Fax Address].
12.
Enter the I-fax address → press [OK].
|
NOTE
|
|
If you do not send documents via a server, and if the recipient's IP address is not registered with a DNS server, enter the domain name in the following format: (user) @ (the recipient's IP address).
|
13.
Specify the setting for <Send via Server> as necessary.
Set [Standard Field 1] and [Standard Field 2], as necessary.
Standard Field 1 and Standard Field 2 are settings required for using an Internet fax service. For details, contact your service provider.
|
NOTE
|
|
After you press [OK], the standard field that you entered appears as asterisks (********) on the I-fax settings screen.
|
For more information on sending via a server, see step 8 of "Specifying Destinations by Entering an I-Fax Address."
14.
Press [Destination Conditions].
15.
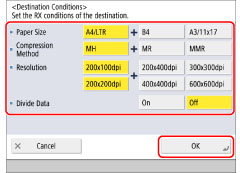
Set the destination conditions → press [OK].
|
<Paper Size>:
|
Set the paper size that the recipient can receive. Specify this setting after checking whether the paper size of the data to send matches the specifications of the recipient's device.
[A4/LTR]: Sends with the A4/LTR size.
[A4/LTR] + [B4]: Sends with the A4/LTR size or B4 size.
[A4/LTR] + [A3/11x17]: Sends with the A4/LTR size or A3/11" x 17" size.
[A4/LTR] + [B4] + [A3/11x17]: Sends with the A4/LTR size, B4 size, or A3/11" x 17" size.
If the paper size of the scanned data is smaller than the sizes set in <Paper Size>, the data is sent with the smallest paper size set in <Paper Size> with blank margins.
If the paper size of the scanned data is larger than the sizes set in <Paper Size>, the data is reduced and sent with the largest paper size set in <Paper Size>.
|
|
<Compression Method>:
|
MH (Modified Huffman): This method scans and compresses extended areas of white and black dots.
MR (Modified Read): This method scans and compresses extended areas of white and black dots. Faster than MH.
MMR (Modified Modified Read): This method is an adaptation of Modified Read, originally for use in digital machines. Faster than MR.
|
|
<Resolution>:
|
Set the resolution that the recipient can receive.
|
|
<Divide Data>:
|
Select [On] if the recipient's machine has a function to combine divided data that is received, or [Off] if it does not.
If the size of the data being sent exceeds the value set for [Maximum Data Size for Sending], the data is divided when sent.
If the size of the data being sent exceeds the value set for [Maximum Data Size for Sending] when [Off] is selected, a sending error occurs.
For instructions on setting the maximum data size for sending, see "Maximum Data Size for Send."
|
|
IMPORTANT
|
|
Set the destination conditions according to the specifications of the recipient's machine. If the paper size of the data to send is larger than the paper sizes that can be used with the recipient's device, the image may be clipped or cut off.
Set the destination conditions according to the specifications of the recipient's machine. If you set conditions that the recipient's machine does not support, a transmission error may occur.
|
16.
Press [OK].
If you are managing Address Book access numbers, perform the procedure in step 13 of "Registering an E-Mail Address."
17.
Press [Close] → [OK].