When White Streaks Appear on Prints (Cleaning the Dust Proof Glass)
When white streaks or other print defects occur, the dust proof glass may be dirty. Follow the procedure below to clean the dust proof glass.
1.
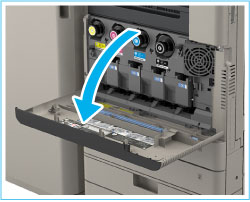
Open the front cover of the main unit.

2.
Remove the dust proof glass cleaner from the rear side of the front cover of the main unit.
3.
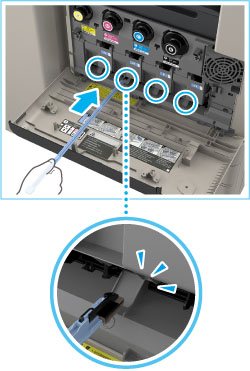
Hold the dust proof glass cleaner so that the pad on the tip is facing down, insert it in the locations shown on the illustration until it stops, and then move it gently back and forth.
Clean the four locations as shown below. There are marks on the main unit that indicate the cleaning locations. Check these marks when cleaning the dust proof glass.

4.
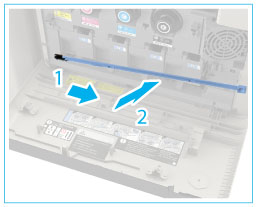
When you have finished cleaning the dust proof glass, gently push the dust proof glass cleaner back onto the rear side of the front cover of the main unit.
Place the dust proof glass cleaner back on the rear side of the front cover of the main unit with its tip facing the left direction.
5.
Close the front cover of the main unit.
 CAUTION CAUTION |
|
When closing the front cover of the main unit, be careful not to get your fingers caught, as this may result in personal injury.
|
