Replacing the Staple Cartridge in the Saddle Stitcher Unit (Booklet Finisher-U1)
When the saddle stitcher unit of the Booklet Finisher-U1 is almost out of staples and the staple cartridge must be replaced, a screen prompting you to replace the staple cartridge appears on the touch panel display. Follow the procedure described below to replace the staple cartridge.
 CAUTION CAUTION |
|
Take care not to be injured by staples.
|
|
IMPORTANT
|
|
If necessary, remove all output paper in the booklet tray before replacing the staple cartridge of the saddle stitcher unit.
|
|
NOTE
|
|
The Booklet Finisher-U1 is an optional products.
We recommend that you order staple cartridges from your local authorized Canon dealer before your stock runs out.
Use only staple cartridges intended for use with this machine.
|
1.
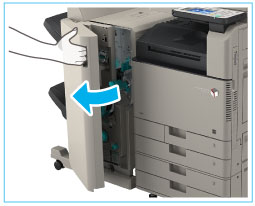
Open the front cover of the finisher.
2.
Pull out the saddle stitcher unit.
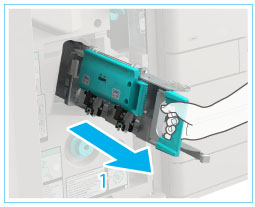 |
1. Grip the handle of the saddle stitcher unit, and pull out until it stops. |
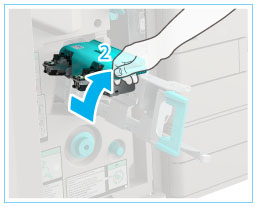 |
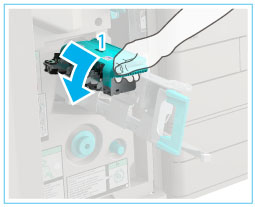
2. Pull the stapler unit of the saddle stitcher unit towards you, and then push it up. |
3.
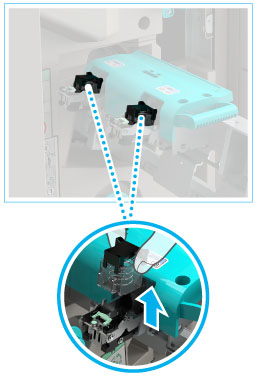
Pull out the empty staple cartridge.
4.
Prepare the new staple cartridge.
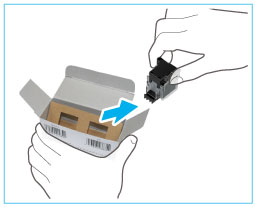 |
1. Remove the (two) new staple cartridges from their box. |
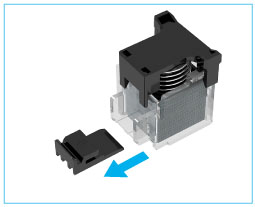 |
2. Remove the black part on the end before inserting the staple cartridge. |
5.
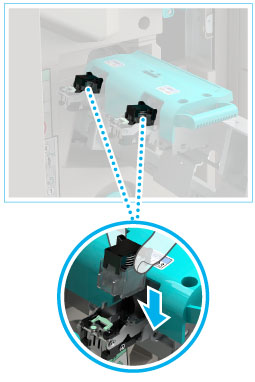
Insert the new staple cartridge in until it clicks into place.
|
IMPORTANT
|
|
When replacing the staple cartridges, replace both the front and back staple cartridges.
Only one staple cartridge can be inserted at a time on each side.
|
6.
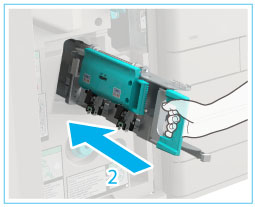
Push the saddle stitcher unit back into its original position.
 CAUTION CAUTION |
|
When pushing the saddle stitcher unit back into its original position, be careful not to get your fingers caught, as this may result in personal injury.
|
7.
Close the front cover of the finisher.
 CAUTION CAUTION |
|
When closing the front cover of the finisher, be careful not to get your fingers caught, as this may result in personal injury.
|
|
IMPORTANT
|
|
When you have replaced the staple case, be sure to manually reposition the staples in the saddle stitcher unit. (See "Saddle Stitch Staple Repositioning.")
|
