Registering Multiple Destinations for Group Dial
Multiple destinations can be combined into groups. You can register up to 299 destinations (100 destinations for e-mails) for a group. After a group is registered, you can add or delete destinations.
1
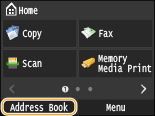
Press  and tap <Address Book>.
 and tap <Address Book>.
2
Tap <Register Dest.>.
If a screen appears prompting you to enter a PIN, enter the correct PIN using the numeric keys, and tap <Apply>. Setting a PIN for Address Book
3
Tap <Coded Dial>.
Groups can also be registered in Favorites. Tap <Favorites> to register the group as Favorites.
4
Tap <Group>.
5
Tap <Name>.
Registering <Name> is optional. If you register <Name>, the destination can be searched alphabetically.
6
Enter the name using the numeric keys, and tap <Apply>.
7
Tap <Number of Destinations>.
8
Tap <Add>.

9
Select the tab and select a destination you want to register.

10
Repeat steps 8 and 9 until you have registered all of the destinations that you want to register, and then tap <Apply>.

11
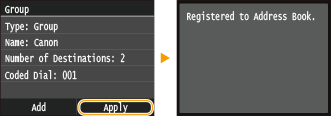
Tap <Apply>.

Editing the Content of Registered Groups
After registering destinations, you can change the content of groups such as names, destinations, and coded dial numbers.
1
Press  and tap <Address Book>.
 and tap <Address Book>.
2
Tap <Details/Edit>.
3
Tap < >, and select the destination you want to change.
 >, and select the destination you want to change.
4
Tap <Edit>.
If a screen appears prompting you to enter a PIN, enter the correct PIN using the numeric keys, and tap <Apply>. Setting a PIN for Address Book
5
Select the item you want to edit, perform editing, and then tap <Apply>.
6
Tap <Apply>.

Deleting a Group
1
Press  and tap <Address Book>.
 and tap <Address Book>.
2
Tap <Details/Edit>.
3
Tap < >, and select the group you want to delete.
 >, and select the group you want to delete.
4
Tap <Delete>.
If a screen appears prompting you to enter a PIN, enter the correct PIN using the numeric keys, and tap <Apply>. Setting a PIN for Address Book
5
Tap <Yes>.