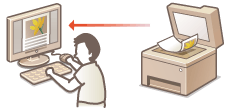
Scanning with AirPrint
You can use AirPrint to transfer the data scanned by the machine directly to a Mac.

System Requirements
To scan with AirPrint, you need a Mac with Mac OS X 10.9 or later installed.
Network Environment
You need one of the following environments.
The Mac and the machine are connected to the same LAN.
The Mac and the machine are connected via USB.

When using USB connection
Set <Select OS for USB Connected PC> to <Mac OS>. Notify to Check Paper Settings
Required Machine Setting
Set <Use Network Link Scan> to <On>.
 Configuring Network Link Scan Settings
<Menu>  <Network Settings>
  <TCP/IP Settings>
  <Use Network Link Scan>
  <On>
<On> 

 <Network Settings>
  <TCP/IP Settings>
  <Use Network Link Scan>
  <On>
<On> 

Scanning from the Mac
1
Make sure that the machine is turned ON and that it is connected to the Mac.
For how to make sure of this, see "Getting Started." Manuals Included with the Machine
2
Add the machine to your Mac from [System Preferences]  [Printers & Scanners].
 [Printers & Scanners].
This operation is not necessary if the registration has already been performed for printing or faxing.
3
Select this machine from the list of printers in [Printers & Scanners].
4
Click [Scan].
5
Click [Open Scanner].
The [Scanner] screen is displayed.
6
Configure the scan settings as necessary.
7
Click [Scan].
Scanning starts, and scanned data is displayed.
 |
|
When <Auto Online for Remote Scan> is set to <Off>, first put the machine into online state by tapping <Scan>
 <Remote Scanner> in this order from the <Home> Screen, then start the procedure for scanning. Remote UI Settings <Remote Scanner> in this order from the <Home> Screen, then start the procedure for scanning. Remote UI SettingsYou cannot scan while settings for printing, copying, or faxing are being made, or while the machine is performing an operation whatsoever.
|