Printing
This section explains the basic printing method using the printer driver.
|
NOTE
|
|
Printing methods may differ depending on the application you are using. For details, see the instruction manuals provided with the application.
|
1.
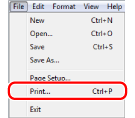
Select [Print] from the [File] menu of the the application.

2.
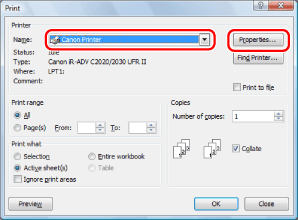
Select your printer from [Name] → click [Properties].

3.
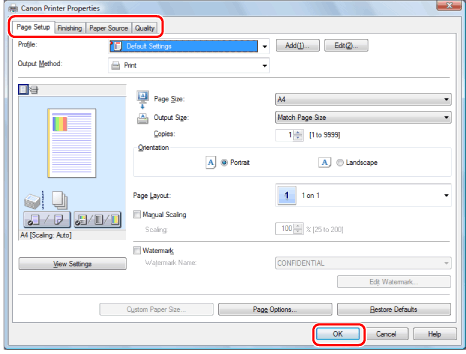
Specify the desired settings in the printer driver screen → click [OK].
Click the tabs for the [Page Setup], [Finishing], [Paper Source], and [Quality] sheets, and then specify the desired items.

|
NOTE
|
|
The default setting for [Print Style] in the [Finishing] sheet is [2-sided printing]. For details, see "1-sided and 2-sided Printing."
For information on available printing functions, see "Printing Functions" or the online help. (See "Viewing the Online Help.")
|
4.
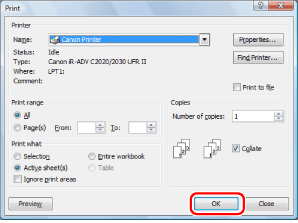
Click [OK].

Printing begins.
|
NOTE
|
|
To stop printing, do so from the Status Monitor/Cancel screen of the printer. (See "Status Monitor/Cancel".)
If a printer icon is displayed in the task tray at the bottom right of your computer monitor, you can stop printing from your computer. Double-click the printer icon → click the name of the file you want to stop printing → click [Document] → [Cancel].
If you are using Web Access Software and you try to print multiple sets while viewing a heavy Web page using the Web browser, printing may take longer to complete.
|