Adjusting Background Density
You can erase the background colour of originals to scan them clearly.
You can adjust the original type so that the background colour is not seen when scanning yellowed originals or originals that have a background colour, such as a catalog.
As an example, the procedure for selecting memory media as the storage location is explained in this section.
1.
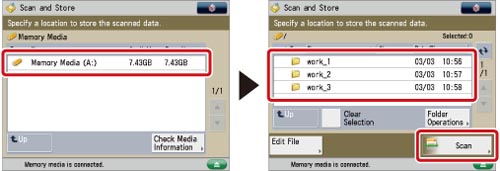
Press [Scan and Store] → [Memory Media].

2.
Select the memory media → select the destination folder → press [Scan].
3.
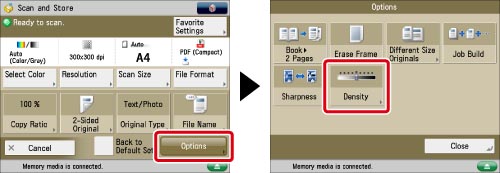
Press [Options] → [Density].
4.
Press [Adjust] for <Background Density>.
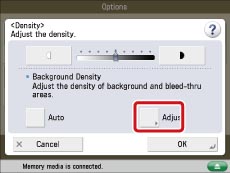
Press [Auto] to automatically adjust the background.
5.
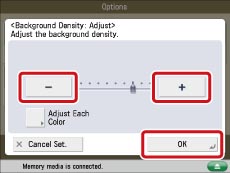
Adjust the background density using [-] and [+] → press [OK].
|
[-]:
|
Dark backgrounds can be erased, but light areas on the original may also be erased.
|
|
[+]:
|
Light areas on the original will not be erased, but some of the background may not be fully erased.
|
To adjust the red, green, and blue densities separately, select [Adjust Each Color]. Adjust the level for erasing each colour using [-] and [+] → press [OK].
|
NOTE
|
|
If you press [Adjust All Colors] on the colour adjustment screen for [Adjust Each Color], the screen returns to the Adjust All Colors screen.
|
6.
Press [OK] → [Close].
|
IMPORTANT
|
|
For information on the modes which cannot be set in combination with this mode, see "Combination of Functions Chart."
Pressing [Adjust] for <Background Density> and making fine adjustments cancels the [Auto] setting for <Background Density>. Similarly, if you press [Auto] for the density after you have adjusted it manually, your adjustments are cancelled. The machine automatically adjusts the density to match the background.
The setting for [Adjust] for <Background Density> is invalid when all of the conditions below are met. The setting is reflected in the image displayed for [Display Image], but not for the actual scanned image.
The colour mode is Black & White
The original type is set to Text
The resolution is set to 100 x 100 dpi, 150 x 150 dpi, or 200 x 100 dpi
To activate [Adjust] for <Background Density>, change the settings.
|