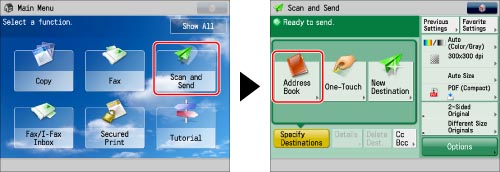
Registering an E-Mail Address
1.
Press [Scan and Send] → [Address Book].
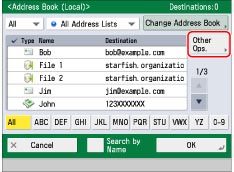
2.
Press [Other Ops.].
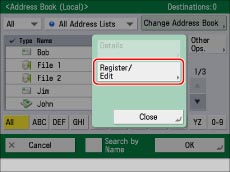
3.
Press [Register/Edit].
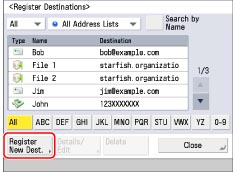
4.
Press [Register New Dest.].
5.
Press [E-Mail].
6.
Press the drop-down list → select one of the numbered Address Lists.
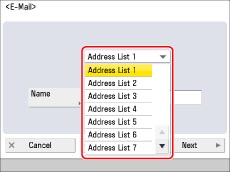
Address lists are a convenient way to classify destinations.
7.
Press [Name].
8.
Enter a name for the recipient of the e-mail address → press [OK].
9.
Press [Next].
10.
Press [E-Mail Address].
11.
Enter the e-mail address → press [OK].
12.
Select one of the following for <Divide Data>.
For details on Divide Data, see step 4 of "Specifying a Destination by Entering an E-mail Address."
13.
Press [OK].
If you are managing Address Book access numbers, perform the following procedure.
Press [Next] → [Access No.] → [Access No.].
Enter the access number using  -
-  (numeric keys) → press [Confirm].
- (numeric keys) → press [Confirm].Re-enter the access number for confirmation → press [OK] → [OK].
14.
Press [Close] → [OK].