Adjusting Background Density
This mode enables you to remove the background colour from originals when scanning.
This mode is useful for scanning originals such as catalogues with background colouring, and paper that has turned yellow from age.
1.
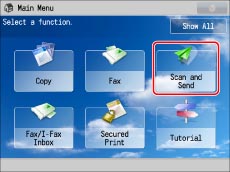
Press [Scan and Send].

2.
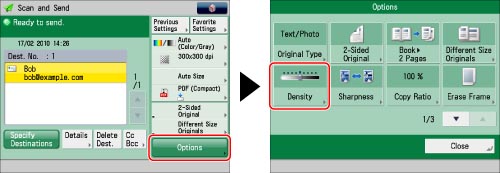
Specify the destination → press [Options] → [Density].

3.
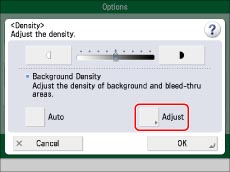
Press [Adjust] for <Background Density>.

To automatically adjust the quality of the background, press [Auto].
4.
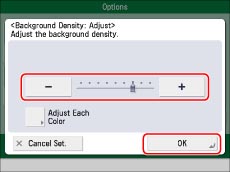
Press [-] or [+] to adjust the density of the background → press [OK].

|
[-]:
|
Prevents dark background colour from being scanned, but light areas on the original may not be scanned either.
|
|
[+]:
|
You may not be able to completely prevent dark background colour from being scanned, but light areas on the original are always scanned.
|
Press [Adjust Each Color] to adjust the density of red, green, and blue colour independently. Press [-] or [+] to adjust the density of each colour → press [OK].
|
NOTE
|
|
If you press [Adjust All Colors] on the colour adjustment screen for [Adjust Each Color], the screen returns to the Adjust All Colors screen.
|
5.
Press [OK] → [Close].
|
IMPORTANT
|
|
Pressing [Adjust] for <Background Density> and making fine adjustments cancels the [Auto] setting for <Background Density>. Similarly, if you press [Auto] for the density after you have adjusted it manually, your adjustments are cancelled. The machine automatically adjusts the density to match the background.
The setting for [Adjust] for <Background Density> is invalid when all of the conditions below are met. The setting is reflected in the image displayed for [Preview], but not for the actual scanned image.
The colour mode is Black & White
The original type is set to Text
The resolution is set to 100 x 100 dpi, 150 x 150 dpi, or 200 x 100 dpi
To activate [Adjust] for <Background Density>, change the settings.
|