Switching the Colour Mode
As an example, the procedure for printing JPEG and TIFF files that are stored in memory media is explained in this section.
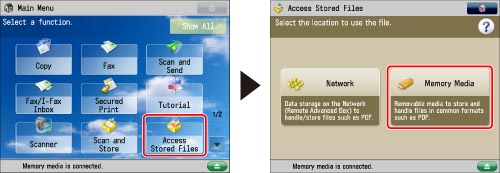
1.
Press [Access Stored Files] → [Memory Media].
2.
Select the desired memory media → select the location where the file you want to print is stored.

3.
Select the desired file → press [Print].

If you select a PDF file, proceed to step 5.
4.
Select the paper size → press [OK].
5.
Press [Select Color] → select the colour mode → press [OK].

To change the paper source, see "Paper Selection."
|
IMPORTANT
|
|
For information on the modes which cannot be set in combination with this mode, see "Combination of Functions Chart."
|
|
NOTE
|
|
If you try to perform colour printing immediately after black printing, a message may appear indicating the machine is preparing for colour printing. Please wait for a moment until the message disappears. Colour printing will start when the message disappears.
You can register a desired colour mode as the default setting by changing the default Stored File settings. (See "Specifying the Stored File Settings.")
The default setting is 'Auto (Color/Black)'.
If a black-and-white file is printed in the Auto (Color/Black) mode, it is counted as a colour print.
|