Special Mode
Use the Special Mode settings to fix print quality problems.
Read the following carefully before changing the settings.
|
IMPORTANT
|
Maintain the default settings under normal conditions:Change the settings only when the problems mentioned below occur.
|
Settings That Can Be Specified From the Operation Panel
Settings
 |
Default settings are highlighted in bold.
|
|
Special Mode
|
Options
|
Details
|
||||||||
|
Special Mode O
|
Off, Mode 1, Mode 2
|
Paper jams may frequently occur when using the multi-purpose tray to copy/print on the reverse side of paper that has already been copied/printed on, depending on the paper type (especially with thin paper and curled paper).
In this case, change this setting to <Mode 1> or <Mode 2>.
<Off> should normally be specified for this setting. Only change this setting if the above symptom occurs.
If you change this setting to <On> when printing on paper other than thin paper, white patches may appear in printed images.
|
||||||||
|
Special Mode M
|
Mode 1, Mode 2, Mode 3, Mode 4, Mode 5
|
Marks from toner scattering may appear around text and patterns, depending on the paper type (especially with heavy paper).
In this case, change this setting. The order of the level of improvement is as follows.
|
||||||||
|
Special Mode N
|
Off, Mode 1, Mode 2
|
Paper jams may frequently occur when copying/printing on the back of copied/printed paper, depending on the paper type (especially with curled paper and damp paper). In this case, change this setting to <Mode 1> or <Mode 2>.
|
||||||||
|
Special Mode S
|
Off, Mode 1, Mode 2
|
When you change the paper size and continue the print, the machine stops its operations until the new paper is loaded. You can shorten this waiting time to prioritize print speed.
The order of waiting times is as follows.
|
||||||||
|
Special Mode P
|
Off, On
|
Printed paper may become curled, depending on the paper type and usage environment. In this case, change this setting to <On>.
|
||||||||
|
Special Mode F
|
Off, Mode 1, Mode 2, Mode 3
|
Uneven images may appear on the printed paper. In this case, change this setting.
The order of the level of improvement is as follows.
|
Specifying Special Mode Settings From the Operation Panel
1
Press [ ] (Settings/Registration).
] (Settings/Registration).2
Press [ ] or [
 ] to highlight <Adjustment/Maintenance>, and then press [OK].
] or [] to highlight <Adjustment/Maintenance>, and then press [OK].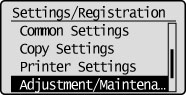
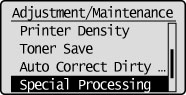
3
Press [] or [] to highlight <Special Processing>, and then press [OK].
] or [] to highlight <Special Processing>, and then press [OK].