Manual Feeder Cleaning
If your originals have black streaks or appear dirty after copying them using the feeder, this may be caused by pencil writing rubbing off the originals and onto the roller. Perform this feeder cleaning procedure to clean the feeder scanning area, film, and roller.
 WARNING WARNING |
|
When cleaning the machine, first turn OFF the main power switch and disconnect the power cord. Failure to observe these steps may result in a fire or electrical shock.
|
|
IMPORTANT
|
|
Do not dampen the cloth too much, as excess water may damage the machine.
If the feeder scanning area is dirty, it may result in a paper jam or smudged or dirty prints.
Clean the roller while spinning it with your hand.
|
|
NOTE
|
|
This procedure is necessary only if the optional feeder (DADF-AM1) is attached.
|
1
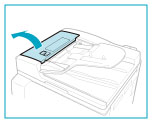
Open the feeder cover.
2
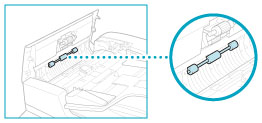
Clean the rollers (a total of three places) inside the feeder cover with a cloth dampened with water. Then wipe the area with a soft, dry cloth.
3
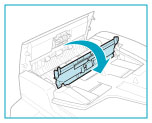
Open the inner cover, holding it by its front tab.
4
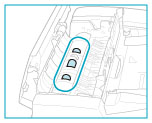
Clean the rollers (a total of three places) inside the inner cover with a cloth dampened with water. Then wipe the area with a soft, dry cloth.
5
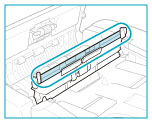
Clean the transparent plastic part of the inner cover with a cloth dampened with water. Then wipe the area with a soft, dry cloth.
6
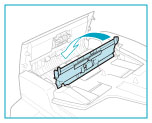
Close the inner cover.
 CAUTION CAUTION |
|
When closing the inner cover, be careful not to get your fingers caught, as this may result in personal injury.
|
7
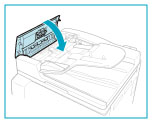
Close the feeder cover.
 CAUTION CAUTION |
|
When closing the feeder cover, be careful not to get your fingers caught, as this may result in personal injury.
|
8
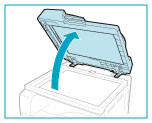
Lift the feeder.
9
Clean the feeder scanning area (the left side of the platen glass) and the document feeding roller, with a cloth dampened with water. Then, wipe the area with a soft, dry cloth.
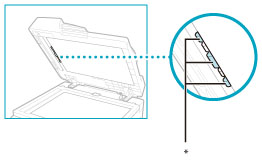
* Document Feeding Roller
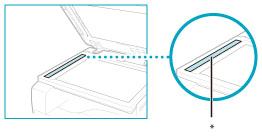
* Feeder Scanning Area
10
Close the feeder.
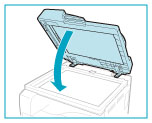
 CAUTION CAUTION |
|
When closing the feeder, be careful not to get your fingers caught, as this may result in personal injury.
|