Setting SNMPv1
|
Before setting the SNMPv1, see "Attention (Setting SNMPv1)."
|
You can restrict the users who can specify and browse the settings or obtain machine information easily using the SNMPv1 protocol.
1
Press [ ] (Settings/Registration).
] (Settings/Registration).2
Press [ ] or [
 ] to highlight <System Management Settings>, and then press [OK].
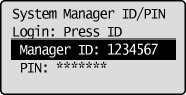
] or [] to highlight <System Management Settings>, and then press [OK].If System Manager Information Settings are specified:
Use the numeric keys to enter the System Manager ID and PIN, and then press [OK].
Press  (Log In/Out).
(Log In/Out).3
Press [] or [] to highlight <Network Settings>, and then press [OK].
] or [] to highlight <Network Settings>, and then press [OK].
4
Press [] or [] to highlight <SNMP Settings>, and then press [OK].
] or [] to highlight <SNMP Settings>, and then press [OK].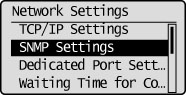
5
Press [] or [] to highlight <SNMPv1 Settings>, and then specify the SNMPv1 protocol.
] or [] to highlight <SNMPv1 Settings>, and then specify the SNMPv1 protocol.If you do not use the SNMPv1 protocol:
|
(1)
|
Press [
] or [] to highlight <SNMPv1 Settings: On>, and then press [OK]. |
|
(2)
|
Press [
] or [] to highlight <Off>, and then press [OK]. |
|
(3)
|
Press [
] (Settings/Registration) to close the Settings/Registration screen. |
|
(4)
|
Restart the machine.
Turn OFF the machine and wait for at least 10 seconds before turning it ON again.
|
If you use the SNMPv1 protocol:
|
(1)
|
Press [
] or [] to highlight <SNMPv1 Settings: Off>, and then press [OK]. |
||||||||||||||||||||
|
(2)
|
Press [
] or [] to highlight <On>, and then press [OK]. |
||||||||||||||||||||
|
(3)
|
Press [
] or [] to highlight a setting item, and then press [OK].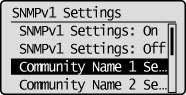 |
||||||||||||||||||||
|
(4)
|
Specify the SNMPv1 protocol.
|
6
Press [] or [] to highlight <Acquire Printer Mngt. Info. from Host>, and then press [OK].
] or [] to highlight <Acquire Printer Mngt. Info. from Host>, and then press [OK].If you are using Windows Vista/7/8, specify whether or not to automatically activate the function for port monitoring via SNMPv1.
|
<Off>
|
Acquire Printer Mngt. Info. from Host is not automatically acquired.
|
|
<On>
|
Acquire Printer Mngt. Info. from Host is automatically acquired.
|
7
Press [] (Settings/Registration) to close the Settings/Registration screen.
] (Settings/Registration) to close the Settings/Registration screen.8
Restart the machine.
It is necessary to restart the machine to take effect the settings.
Turn OFF the machine and wait for at least 10 seconds before turning it ON again.
Turn OFF the machine and wait for at least 10 seconds before turning it ON again.